Redarc Tow Pro Elite Installation Guide
Installing a Redarc Tow-Pro Elite brake controller on your rig can save you over $300 in labor costs if you DIY. I've seen dealers charge upwards of $500 for an install that takes me 2 hours with basic hand tools.
The Lineup

Redarc Tow-Pro Elite V3 Brake Controller
Check on Amazon →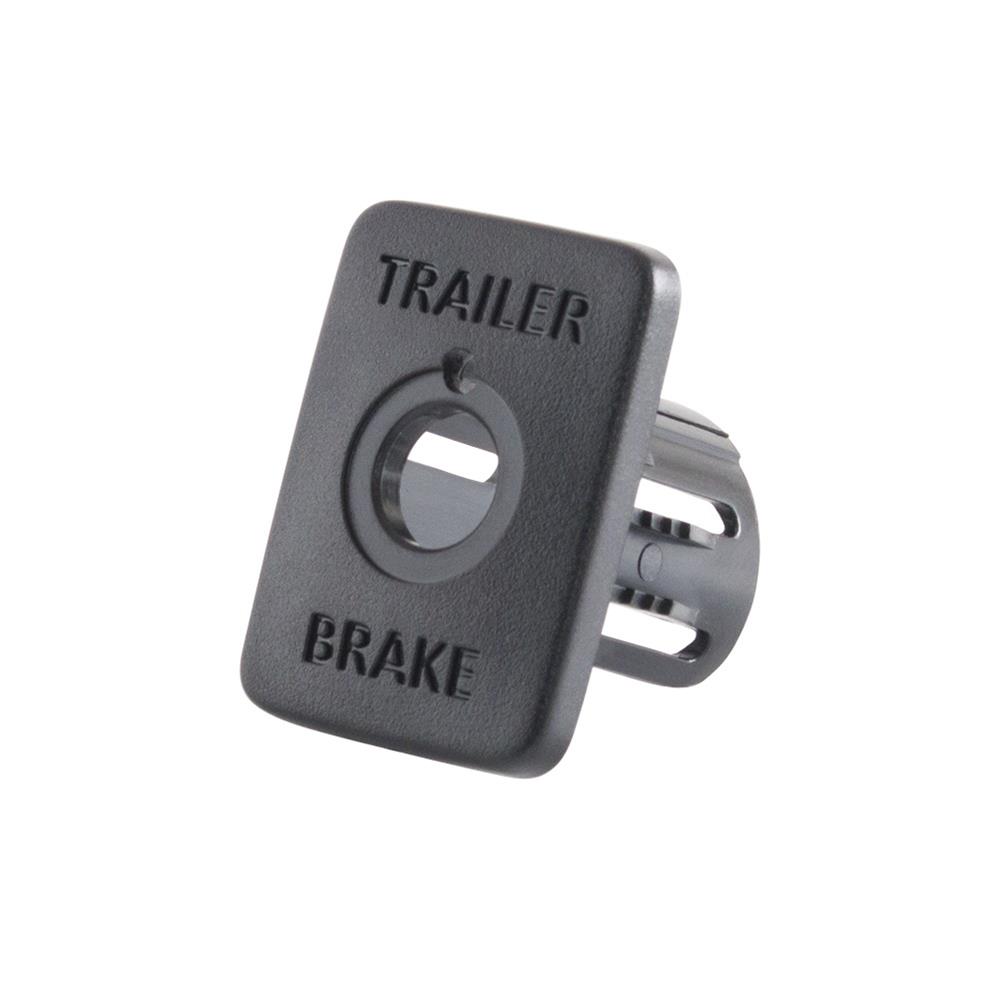
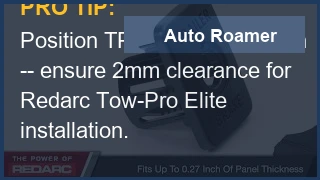
Redarc TPSI-001 Tow-Pro Switch Insert Panel
Check on Amazon →
Redarc TPWKit-013 Wiring Kit for Toyota 4Runner (2010+)
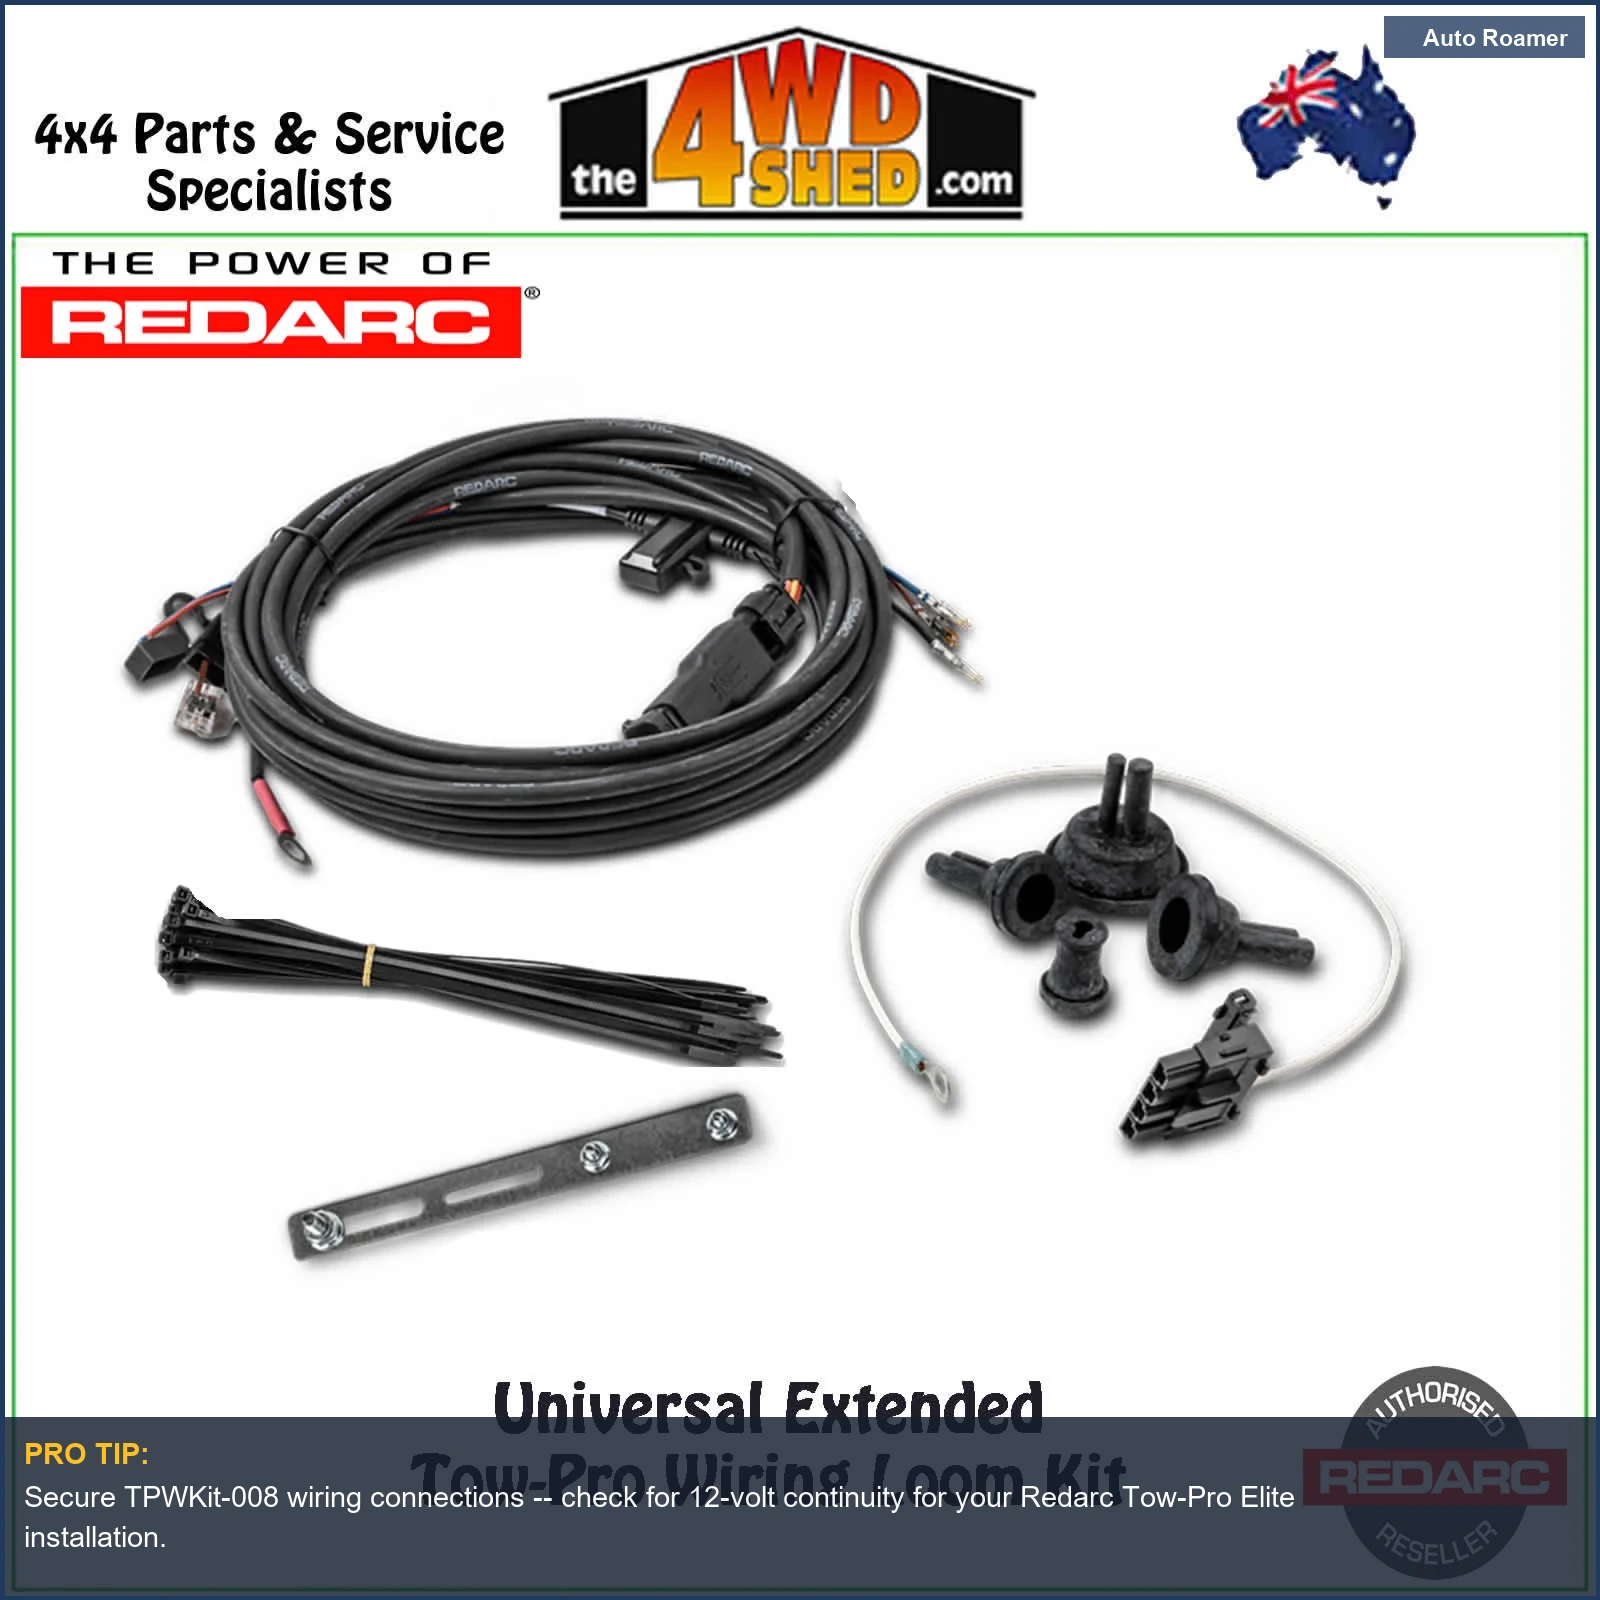
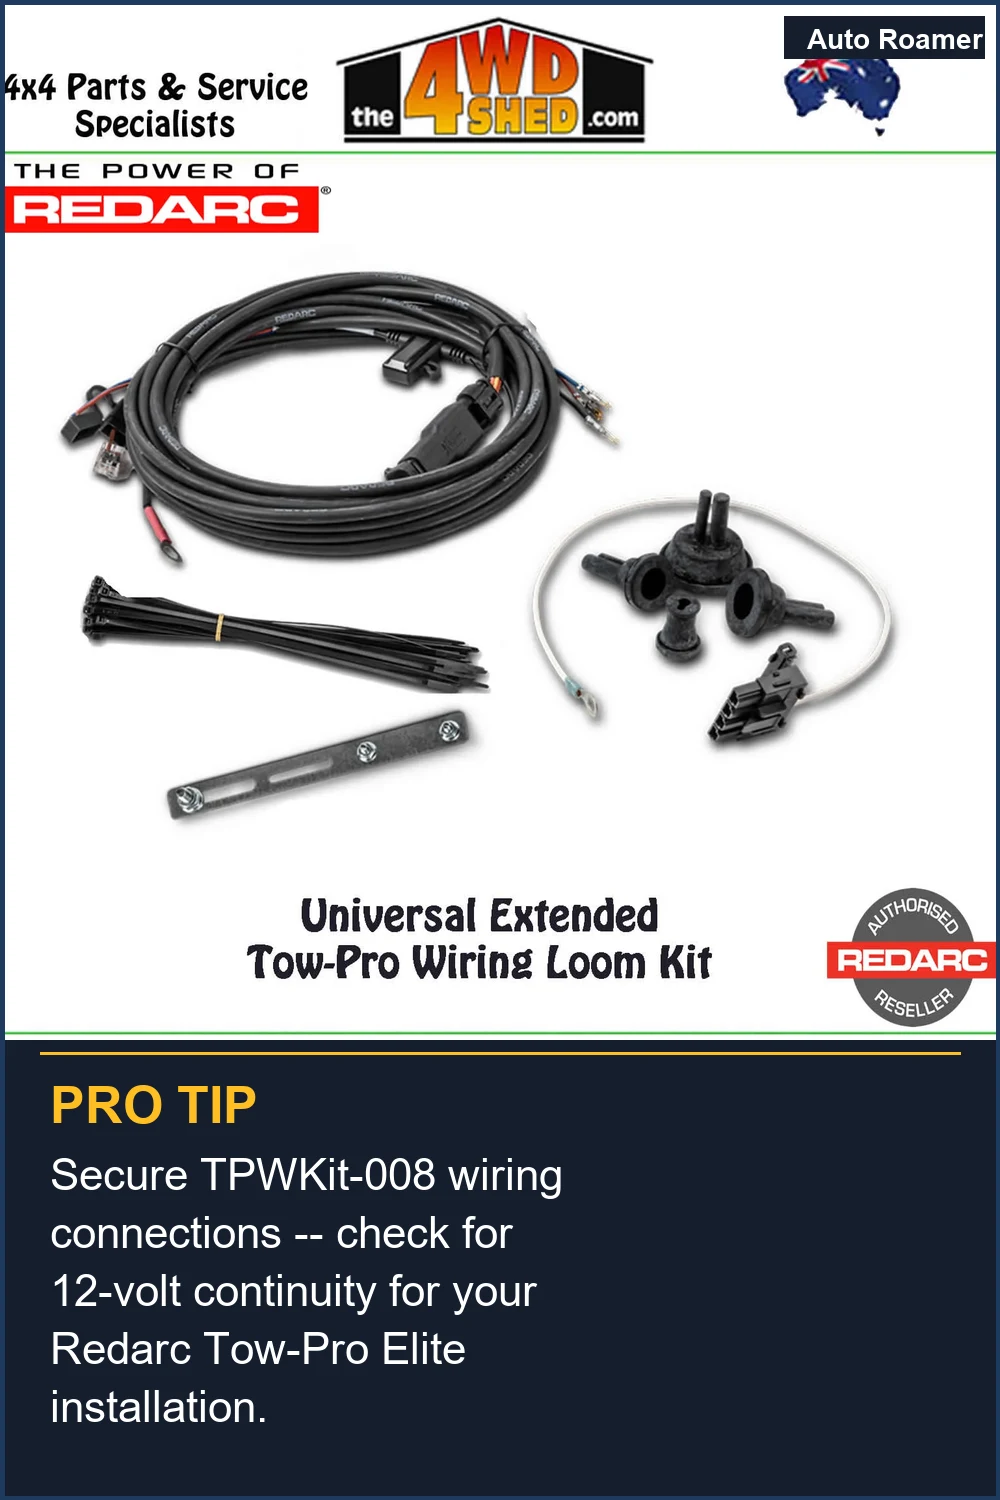
Redarc TPWKit-008 Wiring Kit for Jeep Grand Cherokee (2005-2010)
Redarc TPWKit-015 Wiring Kit for Ford F-150 (2015+)
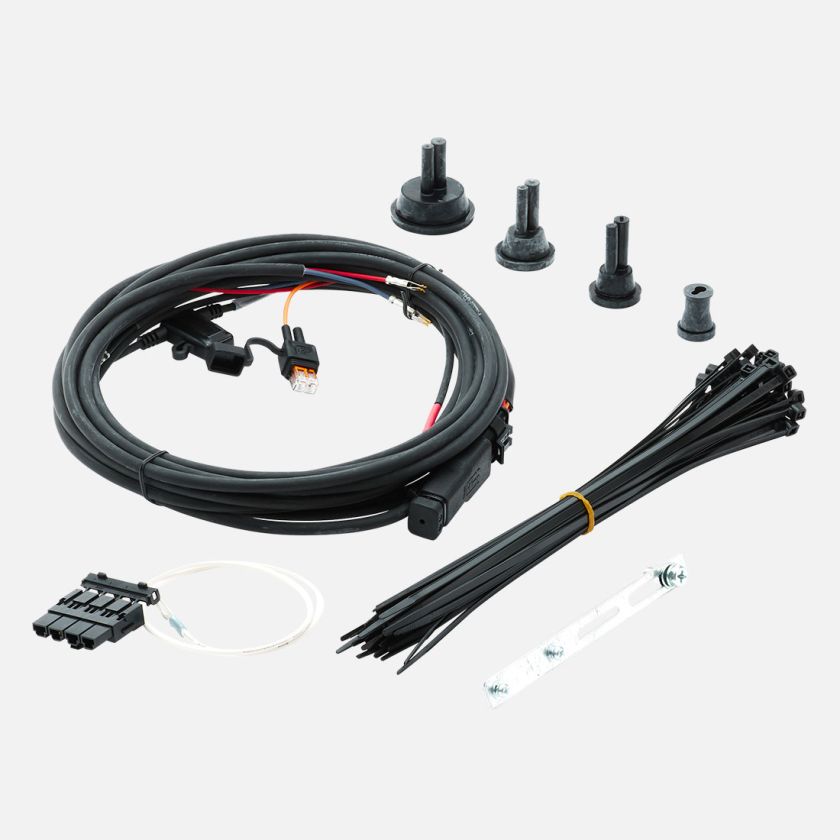
Redarc TPWKit-001 Universal Wiring Harness
Installing a Redarc Tow-Pro Elite brake controller on your rig can save you over $300 in labor costs if you DIY. I've seen dealers charge upwards of $500 for an install that takes me 2 hours with basic hand tools. It's not rocket science, but it does involve understanding where your vehicle's CAN Bus system gets its signals from. Modern vehicles are a wired mess, but the principles are still solid.
⭐ Quick Picks
Quick Verdict
Quick Verdict
- Hidden Main Unit, Visible Knob: The genius of the Redarc Tow-Pro Elite is that the main control unit stays out of sight, tucked away under the dash. Only the small, tactile control knob is visible, which means no banging your knee on a bulky box. This design minimizes mechanical interference with the driver's lower extremities.
- Dual Braking Modes: You get two modes: Proportional and User-Controlled. Proportional mode uses a three-axis accelerometer to sense vehicle deceleration and apply trailer brakes smoothly. User-Controlled mode gives you manual override for tricky terrain, like crawling down a 20-degree muddy hill. It's not just a fancy switch; it's about altering the braking force curve.
- CAN Bus Compatibility: Modern trucks use a Controller Area Network (CAN Bus) for communication, which can make tapping into signals a pain. Redarc offers vehicle-specific harnesses that simplify the wiring, often turning a complex install into a 30-minute plug-and-play job if your vehicle has a factory tow-prep package. Otherwise, you're splicing.
- Self-Leveling Technology: This isn't just a marketing gimmick. The internal accelerometer self-levels, meaning you can mount the main unit in any orientation. This flexibility reduces installation time and improves long-term reliability by avoiding awkward mounting angles that stress wiring harnesses.
- Robust Construction: Redarc units are built for Australian conditions, which means they can handle extreme thermal cycling and vibration. The control knob uses shock-absorbing elastomers, which is critical for preventing fatigue failure in impact zones.
- DIY-Friendly with Caveats: If your vehicle has a factory tow package, installation is straightforward. Without it, you'll be locating brake signals, 12V constant, and ground, which can be more involved. A basic install can be done in 2 hours, saving you a $200+ labor charge.
What to Look For
What to Look For
When you're trying to figure out how to get a Redarc Tow-Pro Elite into your rig, you need to think about more than just where the knob goes. It's about signal integrity and mechanical stability. Here's what I always check:
| Factor | What to Look For (Physics/Engineering) | Why it Matters (Failure Mode) |
|---|---|---|
| Vehicle Tow Prep Package | Factory wiring harness with dedicated brake controller outlet. | Eliminates splicing, ensuring optimal circuit integrity and reducing voltage drop. Plug-and-play harnesses prevent cold solder joints and crimp failures. |
| Brake Signal Source | Tap into the brake light switch or a dedicated brake signal wire. Verify voltage changes (0V to 12V) upon pedal depression. | Incorrect signal tapping can lead to erratic braking or no braking at all. A false signal input from a CAN Bus can cause system errors. |
| 12V Constant Power | Direct connection to the battery or a fused 12V accessory circuit rated for at least 30A. Measure voltage drop under load. | Insufficient current will cause the controller to brown out, leading to intermittent or weak trailer braking. Voltage sag under load is a common issue. |
| Ground Connection | Secure, clean chassis ground point, preferably directly to the frame or battery negative terminal. Verify resistance less than 0.1 Ohm. | Poor ground creates resistance, leading to heat buildup, voltage drop, and potential corrosion at the connection point. Electrical noise. |
| Main Unit Mounting Location | Hidden, secure location away from direct heat sources, mechanical vibration, and potential moisture ingress. Use machine screws, not self-tappers. | Vibration can induce micro-fractures in circuit board solder joints. Thermal cycling from engine heat can accelerate component degradation. Mounting out of sight protects it. |
| Control Knob Placement | Ergonomic and easily accessible for manual override, but out of the direct path of knees or accidental contact. Ensure sufficient panel thickness for secure mounting. | Repeated impact can lead to fatigue failure of the mounting hardware or internal potentiometer. The knob needs to be tactile, not wobbly. |
| Wiring Gauge | Ensure appropriate wire gauge (typically 10-12 AWG for main power) to handle peak current draw without excessive voltage drop. | Undersized wire acts as a resistor, generating heat (I2R losses) and reducing power delivery to the trailer brakes. Fire risk. |
Our Top Picks for Reliable Performance
Our Top Picks for Reliable Performance
When it comes to installing a Redarc Tow-Pro Elite, the core unit is solid. The real difference-makers are the vehicle-specific harnesses and mounting solutions. Don't cheap out on these; they dictate circuit integrity and mechanical durability.
Redarc Tow-Pro Elite V3 Brake Controller (~$250)
Capacity/Key Specs: Proportional & User-Controlled modes, 12V/24V compatibility, 3-axis accelerometer, remote head unit.
Pros: Compact main unit, flexible mounting, robust build for off-road.
Australian-engineered for harsh conditions.
Cons: Requires separate wiring harness for plug-and-play.
Best-for Use Case: Any towing scenario where precise, reliable braking is critical, especially off-road or with varied loads. This is the foundation.
Redarc TPSI-001 Tow-Pro Switch Insert Panel (~$25)
Capacity/Key Specs: Vehicle-specific dash blank integration.
Pros: Clean, OEM-like finish for the control knob. No drilling into visible dash panels.
Cons: Only fits specific vehicle dash blanks.
Check your model year.
Best-for Use Case: Drivers who prioritize a factory aesthetic and want to avoid cutting into their interior plastics. It's a simple, elegant mechanical solution.
Redarc TPWKit-013 Wiring Kit for Toyota 4Runner (2010+) (~$60)
Capacity/Key Specs: Plug-and-play harness for specific Toyota models.
Pros: Direct plug into factory harness, no wire cutting or splicing required. Ensures proper gauge and connector integrity. Saves significant install time.
Cons: Vehicle-specific, so check compatibility carefully.
Best-for Use Case: Toyota 4Runner owners with a factory tow package.
This kit eliminates potential human error in wiring connections.
Redarc TPWKit-008 Wiring Kit for Jeep Grand Cherokee (2005-2010) (~$60)
Capacity/Key Specs: Plug-and-play harness for specific Jeep models.
Pros: Simplifies installation dramatically, maintaining electrical system integrity. Prevents warranty issues from aftermarket splicing.
Cons: Specific to older Jeep models.
Newer models may require different harnesses.
Best-for Use Case: Jeep Grand Cherokee owners within the specified model years, especially if you're not comfortable with automotive wiring.
Redarc TPWKit-015 Wiring Kit for Ford F-150 (2015+) (~$70)
Capacity/Key Specs: Plug-and-play harness for newer Ford F-Series trucks.
Pros: Integrates seamlessly with Ford's complex CAN Bus system.
Reduces diagnostic time if issues arise.
Cons: Higher price point than generic harnesses, but worth it for the reliability.
Best-for Use Case: Ford F-150 owners who want a bulletproof, OEM-level integration without cutting into expensive factory wiring. Avoids chasing ghosts in the wiring.
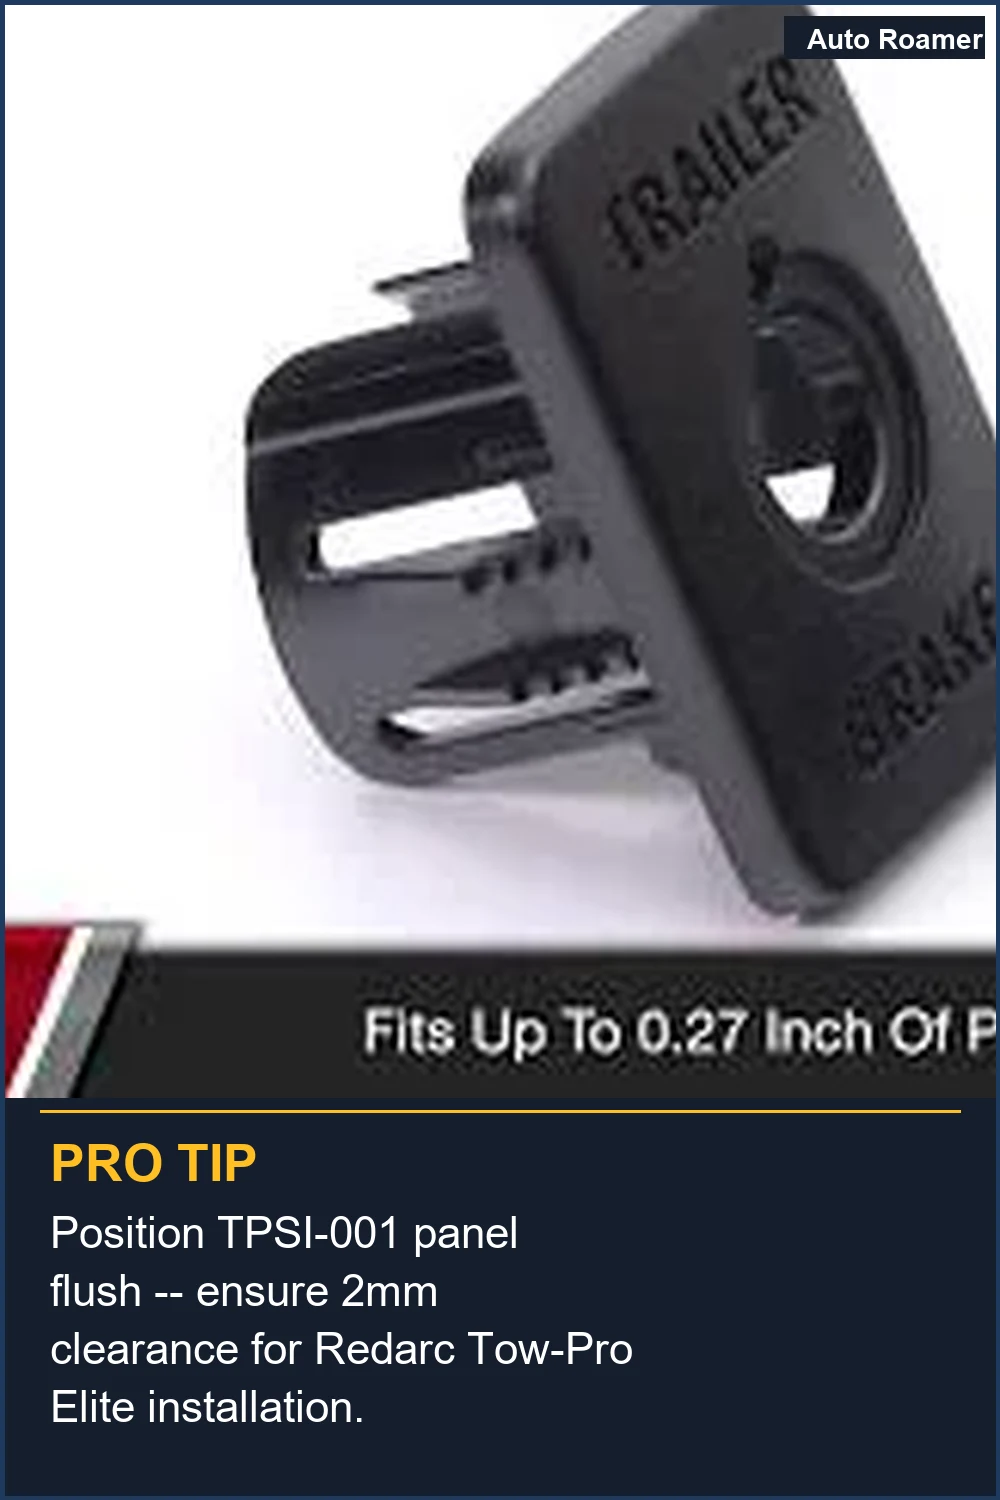
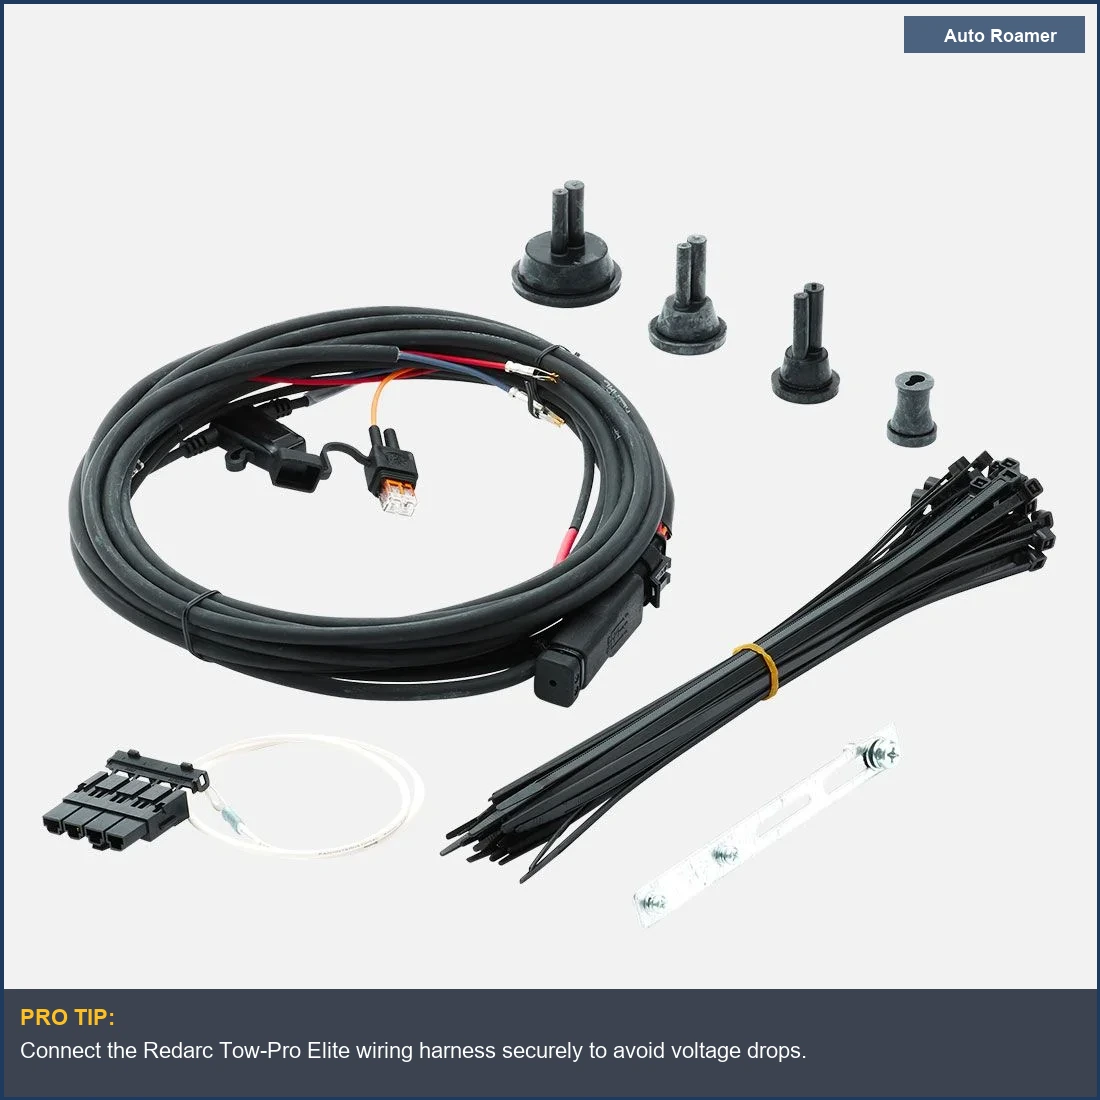
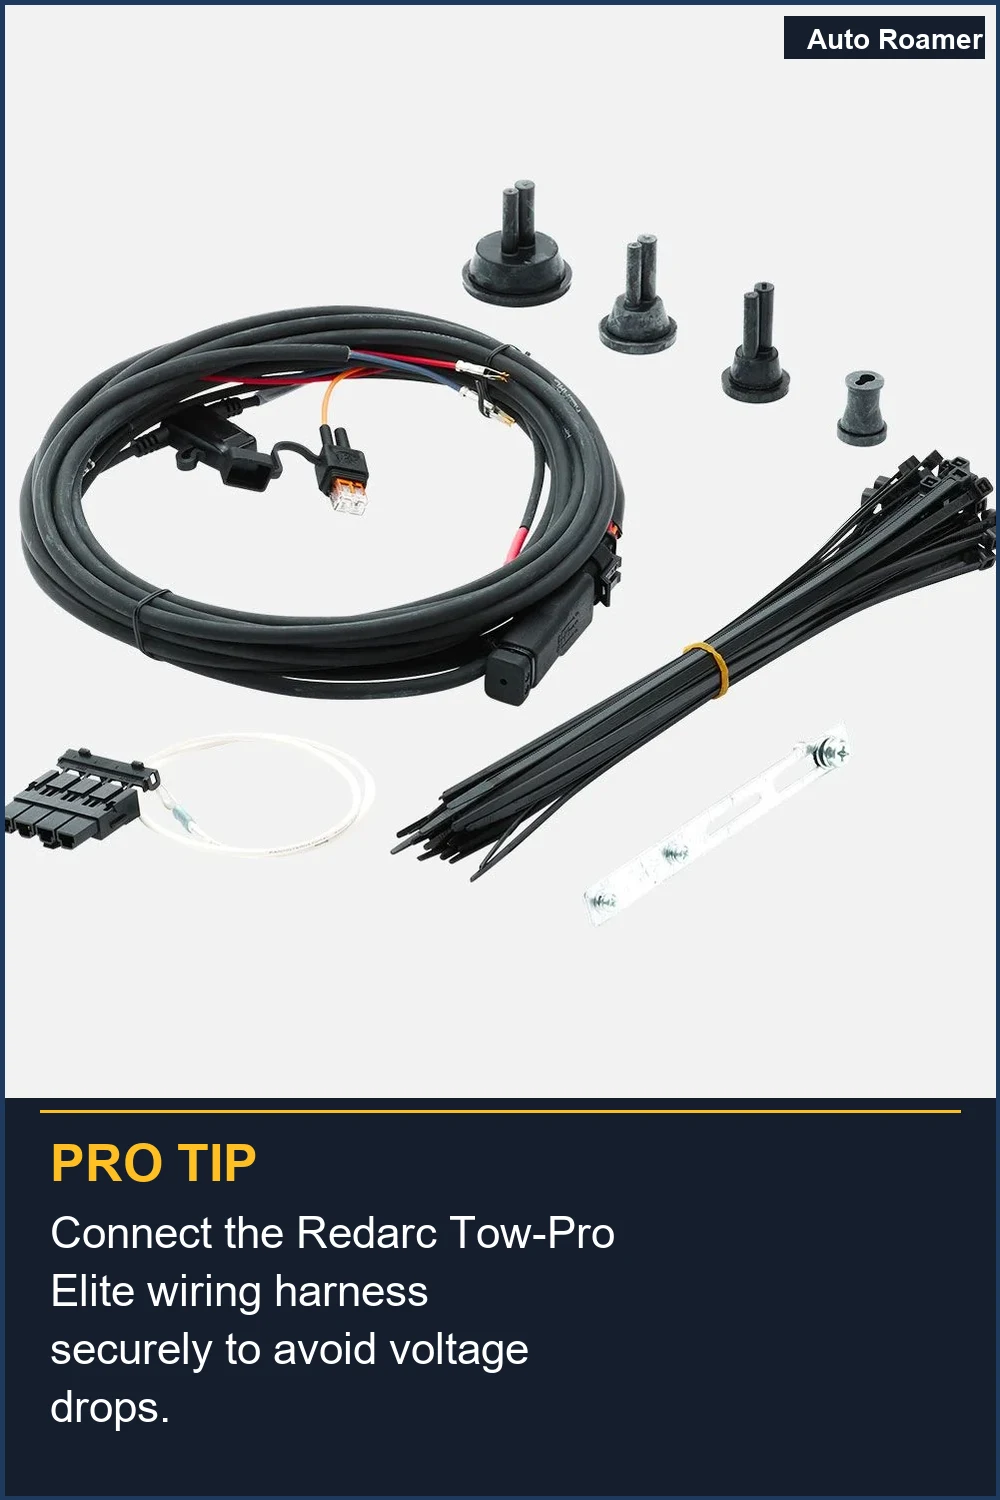
Redarc TPWKit-001 Universal Wiring Harness (~$40)
Capacity/Key Specs: Four-wire pigtail for custom installations.
Pros: Flexible for vehicles without specific plug-and-play options. Allows for direct wiring to power, ground, brake signal, and output.
Cons: Requires wire stripping, crimping, and heat-shrinking.
Higher chance of installer error if not done correctly.
Best-for Use Case: Older vehicles or those without a factory tow package where a vehicle-specific harness isn't available. You'll need decent crimping tools and an understanding of electrical connections.
View on Amazon — Redarc Tow-Pro Elite V3 Brake Controller
View on Amazon — Redarc TPSI-001 Tow-Pro Switch Insert Panel
View on Amazon — Redarc TPWKit-013 Wiring Kit for Toyota 4Runner (2010+)
View on Amazon — Redarc TPWKit-008 Wiring Kit for Jeep Grand Cherokee (2005-2010)
View on Amazon — Redarc TPWKit-015 Wiring Kit for Ford F-150 (2015+)
Head-to-Head Comparison
Head-to-Head Comparison
Let's talk about the real differences between the Redarc Tow-Pro Elite and some of its competition. It's not just about features; it's about the physics of how they apply braking force and their mechanical durability. Some controllers are just better engineered.
| Feature | Redarc Tow-Pro Elite V3 | Traditional Dash-Mounted Proportional Controller (e.g., Tekonsha P3) |
|---|---|---|
| Mounting Location | Main unit hidden, remote knob visible. | Bulky main unit mounted on the dash. |
| Mechanical Stress/Interference | Minimal driver interference. Knob designed for crash impact zones (shock-absorbing elastomers). | Prone to knee bumps, accidental activation, or damage during ingress/egress. Higher risk of fatigue failure on mounting brackets. |
| Braking Modes | Proportional (inertia sensing) and User-Controlled (manual override). | Primarily proportional, some offer boost settings. Manual override is a physical lever. |
| Off-Road Performance | User-Controlled mode excels in varied terrain, allowing precise trailer brake application independent of vehicle deceleration. | Inertia-based systems can be erratic off-road due to vehicle pitching and rolling, leading to inconsistent braking. |
| Installation Complexity | Requires running a small control wire for the knob and main power wires. OEM harnesses simplify significantly. | Requires mounting the entire box, often with multiple screws or brackets, plus running all wiring. More visible wiring. |
| Thermal Cycling Resilience | Main unit hidden, less exposed to direct sunlight and cabin temperature swings. Designed for wide operating temperatures. | Mounted in direct sunlight, leading to higher thermal loads on internal components, accelerating material degradation. |
| Cost (Unit Only) | ~$250 | ~$150 - $200 |
Budget vs Premium: Where Your Money Actually Goes
Budget vs Premium: Where Your Money Actually Goes
You can grab a generic brake controller for $70, or you can drop $250 on a Redarc Tow-Pro Elite. The difference isn't just branding; it's about engineering, materials science, and the long-term reliability of a critical safety system. This isn't a fashion statement; it's about preventing a 6,000-pound trailer from pushing you into a ditch.
| Feature/Component | Budget Brake Controller (~$70) | Redarc Tow-Pro Elite (~$250) |
|---|---|---|
| Accelerometer/Sensor | Often a single-axis, less precise sensor. Susceptible to false readings from vehicle pitch/roll. | Three-axis accelerometer with active calibration. Provides accurate deceleration data regardless of mounting orientation. This is physics, not marketing. |
| Housing Material | Injection-molded ABS plastic, often without UV stabilizers. Prone to brittle fracture from thermal cycling and UV degradation. | Robust, often glass-filled nylon or similar engineered polymer. Designed for vibration damping and wider temperature range. More resilient to mechanical stress. |
| Wiring Harness Quality | Generic, often undersized wire (e.g., 14 AWG where 12 AWG is needed). Connectors may lack proper strain relief or weatherproofing. | High-quality copper wire, appropriate gauge for current draw. OEM-style connectors with robust seals and strain relief to maintain circuit integrity. |
| Control Knob/Interface | Bulky, often flimsy plastic lever or knob. Potentiometer may have significant play, leading to imprecise control. | Compact, tactile knob with shock-absorbing elastomers. High-precision, sealed potentiometer designed for repetitive use without degradation. |
| Installation Flexibility | Requires dash mounting, often in an inconvenient location. Limited wiring options. | Remote main unit allows hidden installation. Only a small knob is visible. Vehicle-specific harnesses simplify wiring. |
| Thermal Management | Minimal internal heat sinking. Components operate at higher temperatures, accelerating outgassing and component failure rates. | Engineered for efficient heat dissipation. Components selected for wide operating temperature range (-40 degrees F to 185 degrees F). Better long-term reliability. |
| Warranty/Support | Often limited 1-year warranty, sparse documentation. | Industry-leading 2-year warranty, extensive support, and detailed installation guides. They stand behind their engineering. |

The Bottom Line
The Bottom Line
- Prioritize Circuit Integrity: The Redarc Tow-Pro Elite is a solid piece of kit, but its performance hinges on clean power, a reliable ground, and an accurate brake signal. Don't skimp on wire gauge or connection quality.
- Mechanical Stress Matters: The hidden main unit and robust control knob are designed to minimize mechanical interference and fatigue failure. Mount the main unit securely to prevent vibration-induced damage. No banging your shin on a cheap plastic box.
- OEM Harnesses are Worth It: If your vehicle has a factory tow package, a plug-and-play harness saves you time and ensures optimal electrical connections, reducing the risk of intermittent faults down the road.
- Understand Your Vehicle's CAN Bus: Modern vehicles are complex. If you're tapping into a CAN Bus system, ensure you're getting the correct signal for brake application. Improper tapping can introduce electrical noise or system errors.
- DIY Saves Cash, But Know Your Limits: A full Redarc install can cost $200-$300 in labor. If you're comfortable with basic automotive wiring and have the right tools, it's a straightforward 2-3 hour job. If not, pay a reputable shop that understands vehicle electronics.

Frequently Asked Questions
What's the real cost difference between DIY and a shop install for a Redarc Tow-Pro Elite?
Do I really need a multimeter to install this, or can I just guess the wires?
What if I install the Redarc, and my trailer brakes still feel weak or inconsistent?
Can installing this brake controller incorrectly permanently damage my vehicle's electrical system?
I heard you can just splice into any wire under the dash for the brake signal. Is that true?
🏅 Looking for Gear Recommendations?
Check out our tested gear guides for products that work with this setup:
Sources
- watch?v=Vx-ne9hY-POc
- Installing the Redarc Tow-Pro Elite Brake Controller on a ... - YouTube
- REDARC Tow-Pro Elite Trailer Brake Controller Install & Overview
- Install and Review of REDARC Tow-Pro Elite Integrated Brake ...
- Plug & Play Brake Controller Install: The REDARC Tow-Pro Elite
- how to | install a tow-pro elite electric brake controller
- facebook.com
- Plug and play brake controller install - REDARC
- How to fit a Tow-Pro Elite into a modern vehicle with a CAN Bus ...
- Redarc brake controller installation guide - Facebook
- Redarc Tow-Pro Elite Full Review - etrailer.com
- etrailer | In-Depth Review of the Redarc Tow-Pro Elite Brake ...