What a Brake Controller Actually Does
A trailer brake controller is the small box that tells your trailer's electric brakes how hard to brake and when. Without one, your tow vehicle carries the entire job of stopping both itself and the trailer, which lengthens stopping distance, overheats your truck's brakes, and lets the trailer shove the hitch forward in a hard stop. Most states legally require a controller once a trailer's loaded weight passes roughly 3,000 pounds, and any trailer with electric drum or electric-over-hydraulic brakes needs one to function at all.
The controller wires into your tow vehicle and into the 7-pin connector that feeds the trailer. When you press the brake pedal, it sends a metered voltage to the trailer's brake magnets. The whole point is synchronization: trailer and truck braking together so the combination behaves like one vehicle instead of two masses fighting each other.
Two design decisions drive everything else about how a controller feels and what it costs:
- How it senses braking — proportional units read your actual deceleration; time-delayed units apply a preset ramp on a timer.
- How much it can drive — its axle rating and output amperage must cover the number of brake magnets on your trailer.
Proportional vs. Time-Delayed: The Decision That Matters Most
This is the single most important spec, and it is worth understanding before you compare brands. The two types behave very differently on the road.
Proportional controllers contain an accelerometer (an inertia sensor) that measures how fast your tow vehicle is actually slowing down. They then apply trailer braking in proportion to that deceleration. A gentle stop produces gentle trailer braking; a hard stop produces hard trailer braking. The result is smooth, matched stops with little of the lurch or push you feel when the trailer brakes too early or too late. The Tekonsha Prodigy P3, REDARC Tow-Pro Elite V3, CURT Echo Mobile, and Hopkins InSIGHT in this guide are all proportional.
Time-delayed controllers have no motion sensor. When you hit the brakes, they ramp trailer braking up to a level and at a rate you set in advance, on a fixed timer. They are simpler, cheaper, and mount in any orientation because there is no accelerometer to level. The trade-off is feel: braking does not track how hard you are actually stopping, so stops can feel slightly delayed or abrupt until you dial in the settings for a given load. The Reese Brakeman IV and Draw-Tite Activator IV here are time-delayed.
If you tow regularly, tow heavy, or drive grades, a proportional controller is worth the extra money for the smoother, more predictable stops. If you tow occasionally on flat ground with a light trailer, a well-set time-delayed unit does the job for less.
Amperage and Axle Capacity: Matching the Controller to Your Trailer
A controller has to drive every brake magnet on the trailer, and magnets draw current. Each electric brake assembly pulls roughly 3 amps, so a tandem-axle trailer with brakes on both axles (four brakes) can draw around 12 amps, and a triple-axle setup more still. If the controller's output rating is below what your brakes demand, braking is weak and the unit can overheat or shut down.
The simple way to read this is the axle rating printed on the box. Most of the units here are rated for 1 to 4 axles (up to 8 brakes), which covers the vast majority of travel trailers, utility trailers, and fifth wheels:
- Tekonsha Prodigy P3 and Reese Brakeman IV and Draw-Tite Activator IV are each rated for 1 to 4 axles (up to 8 brakes).
- REDARC Tow-Pro Elite V3 is rated for trailers up to 3 axles.
- CURT Echo Mobile and Hopkins InSIGHT handle 1 to 2 axles (up to 4 brakes), which is plenty for most single and tandem-axle trailers but worth checking against a heavy tri-axle rig.
Match the rating to your heaviest trailer, not your lightest. A unit rated for more axles than you have is fine; a unit rated for fewer is not.
Installation and Vehicle Compatibility
Installation is where the brands diverge the most, and it is worth thinking about before you buy because it affects both cost and where the unit lives in your cab.
Hardwired under-dash units like the Tekonsha Prodigy P3, Reese Brakeman IV, and Draw-Tite Activator IV connect to four wires: battery power, ground, the brake-light switch, and the trailer-brake output to the 7-pin connector. Many modern trucks and SUVs have a factory tow package with a dedicated plug behind the dash, in which case a vehicle-specific plug-and-play harness makes the job a few-minute connection with no cutting or splicing. Without that factory plug, you are running and tapping wires yourself, which is doable but takes longer.
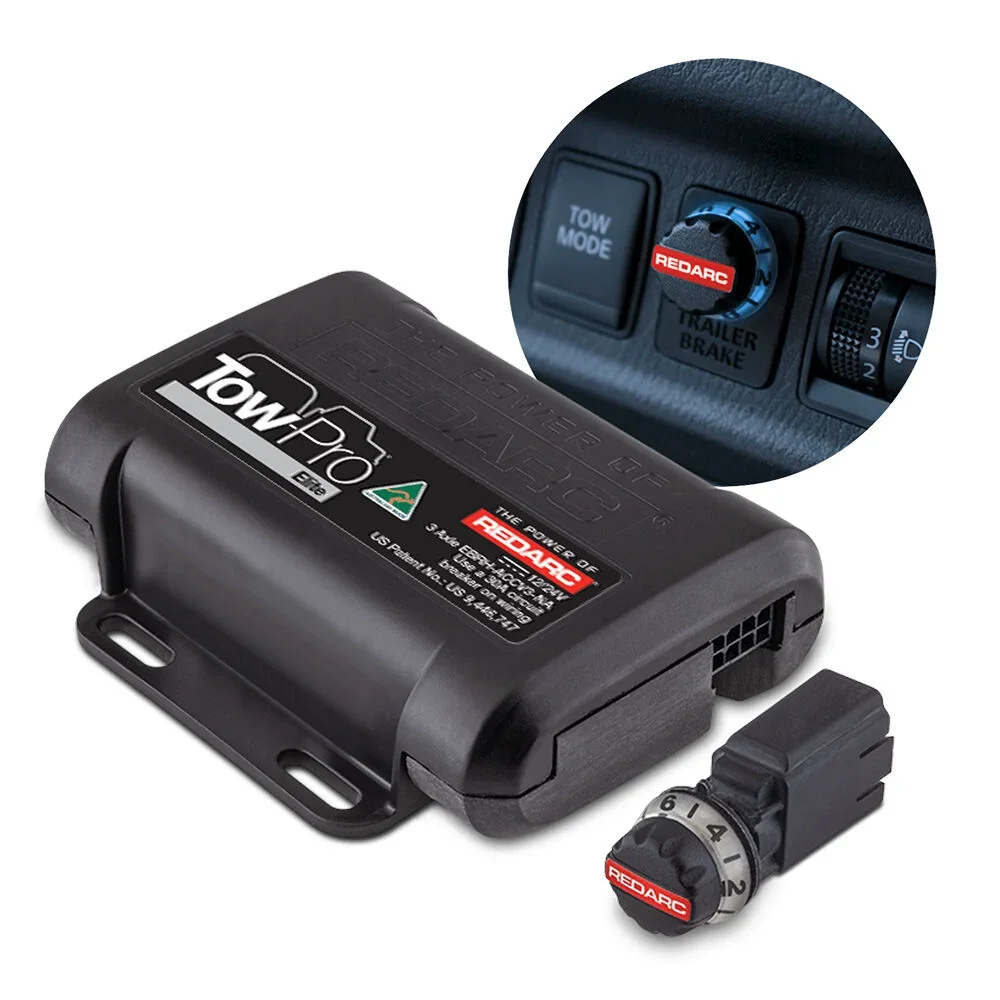
The REDARC Tow-Pro Elite V3 splits into a hidden main module plus a small remote knob that mounts on the dash, so the only thing you see is a single rotary control. It is the cleanest look for a modern cabin, but mounting the knob means drilling a hole for it.
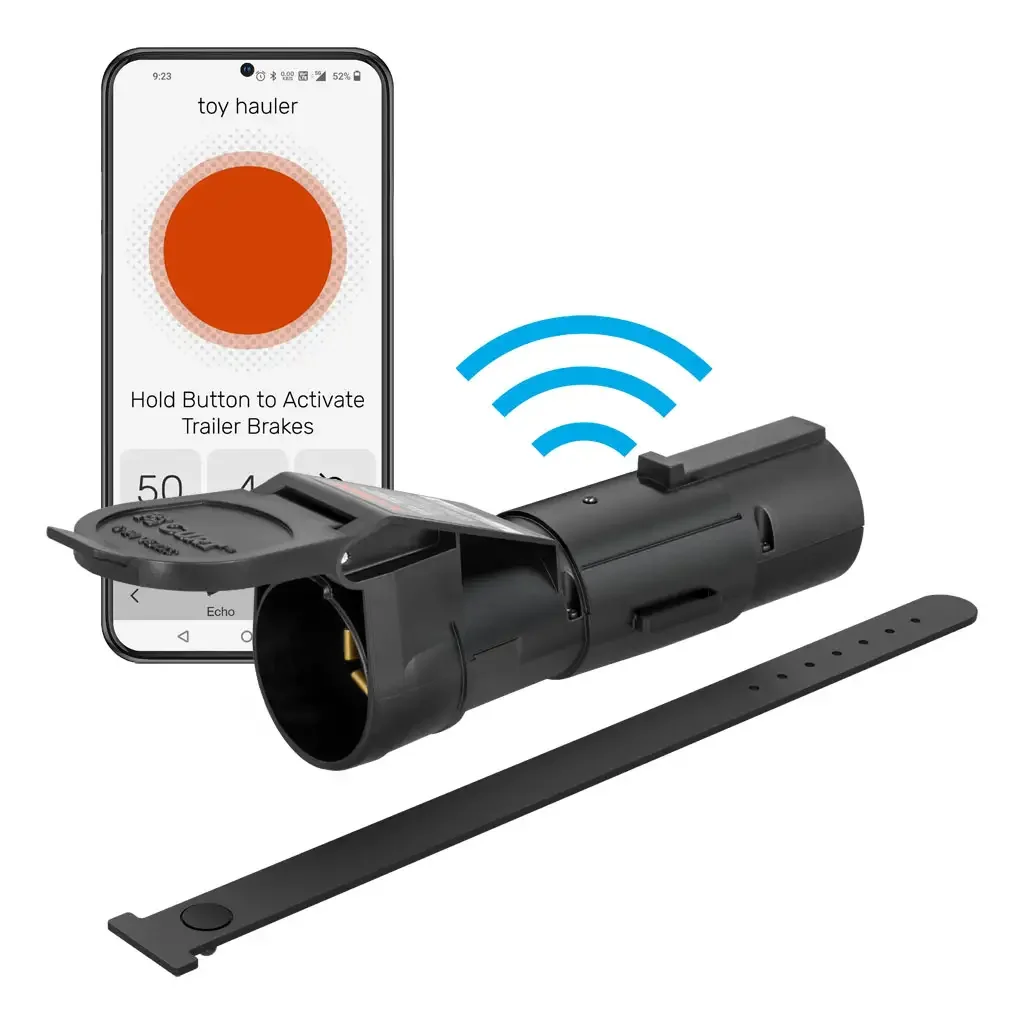
The CURT Echo Mobile skips wiring entirely: it plugs into the 7-pin connector between the truck and trailer and needs no tools, no hole, and no permanent install. That makes it the easy choice for occasional towing, rentals, or moving one controller between vehicles. The trade-off is that the unit hangs at the connector, exposed to road grime, and you control it through a phone app.
On compatibility: a hardwired controller works with essentially any 12-volt tow vehicle, while plug-and-play harnesses are sold per vehicle make and model. Always confirm a harness exists for your specific year and model, or be ready to wire it manually.
Bluetooth and App-Based Controllers
A newer category replaces the dash unit with your phone. The CURT Echo Mobile is the clearest example here: it pairs over Bluetooth to a free app on an Apple or Android phone, and you set gain, sensitivity, and the manual override from the screen. The accelerometer that does the proportional braking lives inside the plugged-in unit itself, not in the phone, so braking does not depend on a live Bluetooth signal to work, and the unit keeps using its last settings if the connection drops.
The appeal is portability and a clutter-free cab. The honest trade-offs are real, though: you rely on a charged, connected phone to change settings on the fly, the app is one more thing that can glitch, and a connector-mounted box sees more weather and impact than a dash unit. For full-time towing many people still prefer a hardwired, always-on control they can reach without unlocking a phone; for flexible or occasional towing the wireless approach is genuinely convenient.
The Controllers Worth Considering

These six cover the realistic range, from simple time-delayed budget units to premium proportional and wireless options. We have not bench-tested these units ourselves; the notes below are drawn from each controller's published specifications and how its design type behaves. Confirm exact fit and current pricing before you buy.
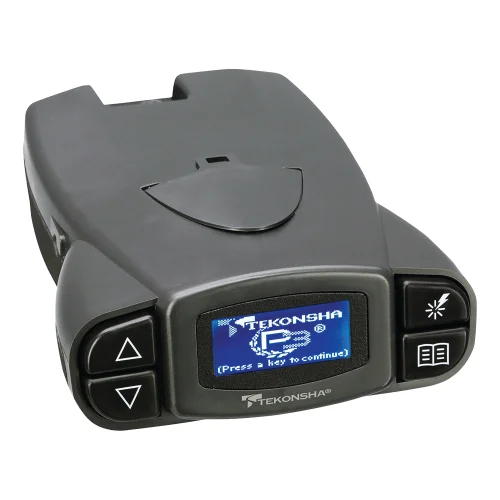
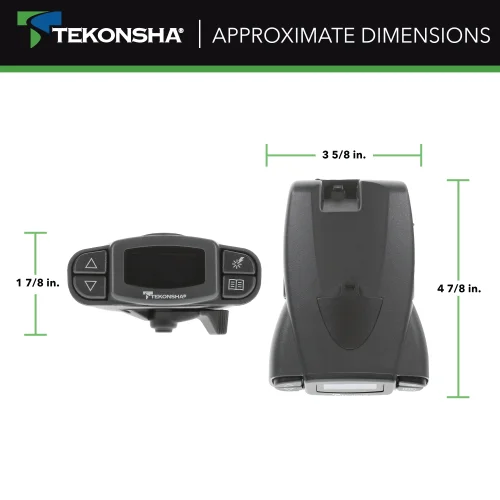
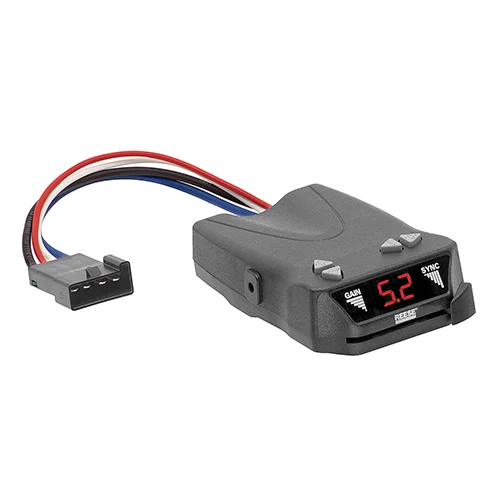
Tekonsha Prodigy P3 — The long-standing proportional benchmark. A backlit display shows real-time output and wiring diagnostics, it stores multiple trailer profiles, a boost setting adds stopping power for heavy loads, and it is rated for 1 to 4 axles. Pairs with vehicle-specific plug-and-play harnesses. A safe, capable pick for regular towing.
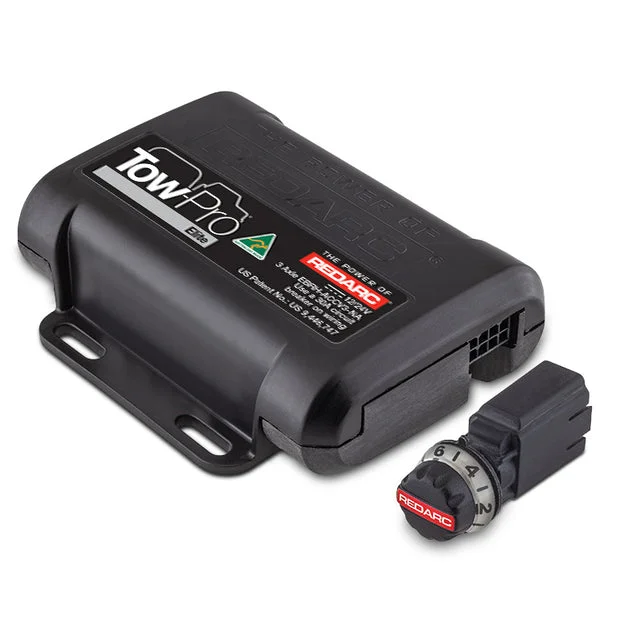
REDARC Tow-Pro Elite V3 — Proportional with a hidden main unit and a single dash knob, plus a user-controlled mode for off-road and steep descents alongside the automatic proportional mode. The cleanest cabin footprint here; rated up to 3 axles. Installation requires drilling for the control knob.
CURT Echo Mobile — Proportional braking from a unit that plugs into the 7-pin connector and is controlled by a phone app over Bluetooth. No wiring, no tools, fully portable between vehicles. Handles 1 to 2 axles. Best for occasional towing and people who want zero permanent install.
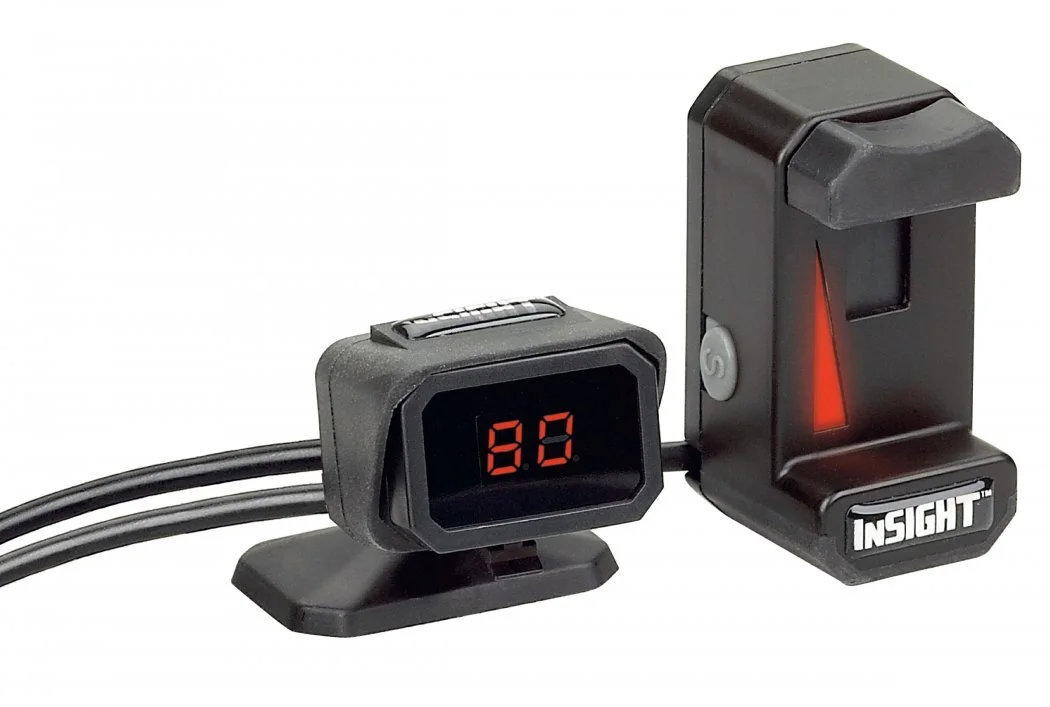
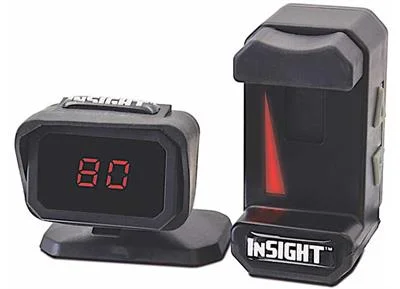
Hopkins InSIGHT — A proportional controller with a flexible mounting design that separates the display from the main module, so you can put the readout where you can see it. Multiple sensitivity settings and a digital display; rated for 1 to 2 axles. A solid mid-priced proportional option.
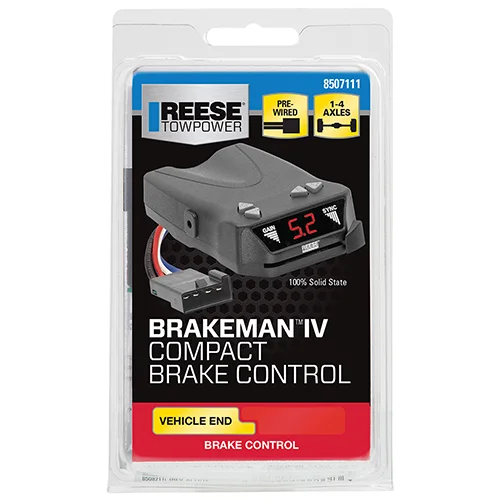
Reese Towpower Brakeman IV — A compact, time-delayed unit that mounts in any orientation with no leveling, has a digital readout, and is rated for 1 to 4 axles. Budget-friendly and simple; the trade-off is the preset-ramp feel rather than true proportional braking.
Draw-Tite Activator IV — A time-delayed controller with a digital display, adjustable output, a slide-bar manual override, and any-angle mounting, rated for 1 to 4 axles. A capable economy choice for lighter, occasional towing where a proportional unit is not essential.
How to Choose for Your Setup
Work the decision in this order and the right unit usually falls out on its own:
- Match the axle rating to your heaviest trailer. Tandem and triple-axle rigs need a unit rated for enough brakes.
- Pick proportional if you tow often, heavy, or on grades. The smoother, matched stops are worth it. Time-delayed is fine for light, occasional, flat-ground towing.
- Decide how you want to install it. Want a clean dash? REDARC. Want no install at all? The wireless CURT Echo. Comfortable wiring or have a factory tow plug? A hardwired Tekonsha, Reese, or Draw-Tite.
- Confirm vehicle compatibility — check that a plug-and-play harness exists for your exact year and model, or plan to wire it.
Whatever you choose, set the gain with the trailer loaded the way you normally tow, find an empty lot, and adjust until a moderate stop is firm but the trailer brakes do not lock up. A controller is only as good as its setup.