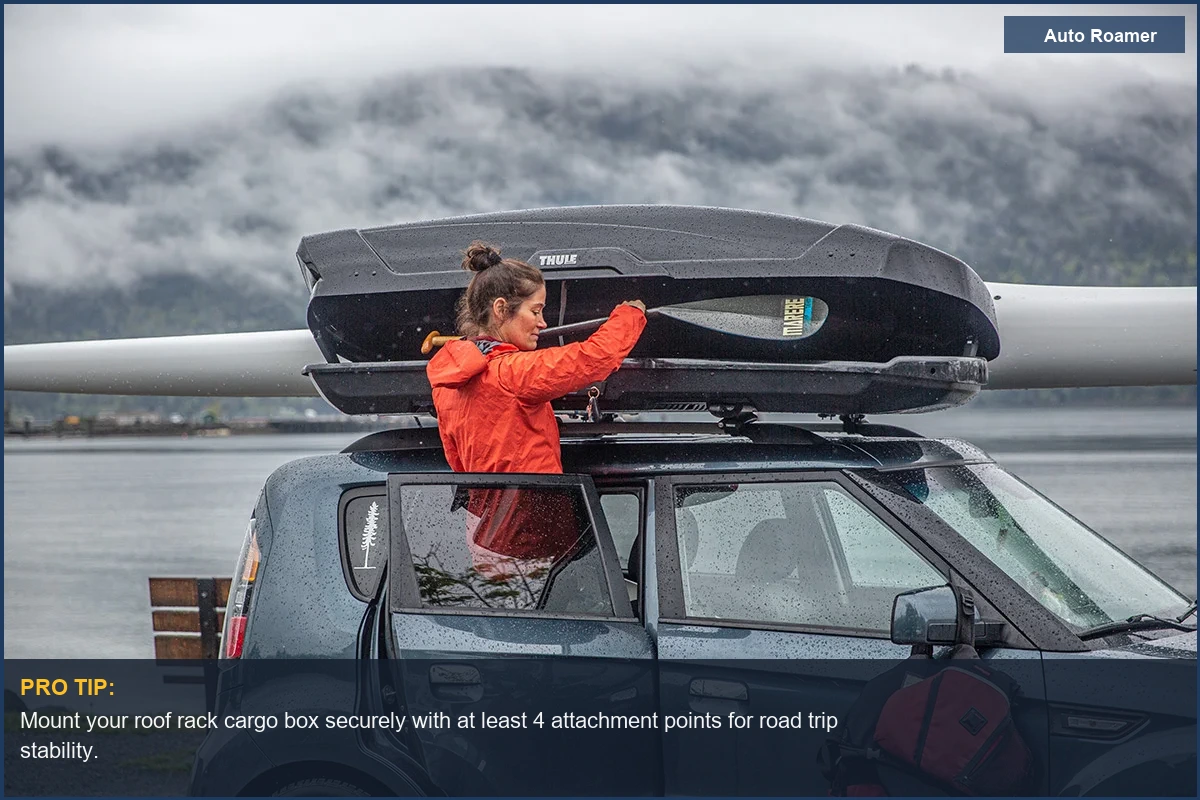
First, the Basics
Forget cramming gear into the backseat until your kids' knees are touching their chins. That 0.5-inch gap between your camping stove and your sleeping bag? That's a stress concentration point for marital friction. A decent roof rack cargo box frees up 10-20 cubic feet of interior volume, which means less thermal cycling on your temper and more legroom for everyone. Car and Driver noted these things turn dorky accessories into stress relief.
I've seen too many cheap roof bags shred themselves at 70 MPH, turning your carefully packed camping gear into aerodynamic confetti. We're talking about material fatigue from constant vibration and wind shear. That's a failure mode you want to avoid, especially when you're 500 miles from the nearest hardware store.
This isn't about looking cool with a sleek black box on your SUV. It's about protecting your expensive outdoor kit from rain, road grit, and opportunistic scavengers. Your tent, sleeping bags, and camp chairs represent a significant investment, and leaving them exposed to the elements is just asking for a premature failure.
When you're trying to fit three coolers, a week's worth of food, and enough recovery gear to pull a semi out of a swamp, every cubic inch counts. The right cargo box makes the difference between an organized trip and a chaotic scramble for that one specific bungee cord. Redditors on r/overlanding praise dual-opening, leak-proof designs for this reason.
Plus, securing your load inside a hard shell reduces aerodynamic drag compared to a flapping tarp or a pile of unsecured gear. Less drag means less fuel consumption, which, with today's gas prices, is a measurable cost reduction over a 1,000-mile road trip. Every penny saved is a penny not spent on fixing something preventable.
Key Features to Consider
Getting Your Head Straight on Cargo Box Specs
First up, Capacity. These things are measured in cubic feet, typically ranging from 10 to 22. My old Yakima Rocketbox, which I snagged for $75 off Craigslist, has 16 cubic feet. That's enough for three duffel bags and a full tackle box. Don't eyeball it; know what you need to haul before you buy. Road & Track emphasizes matching the carrier to your vehicle's needs.
Dimensions matter, especially length. If you're hauling skis, you need a box long enough for them to fit without bending. A 6-foot ski needs at least 74 inches of internal length. Also, consider the height - too tall, and your vehicle's overall height becomes an issue for parking garages. That's a shear force waiting to happen.
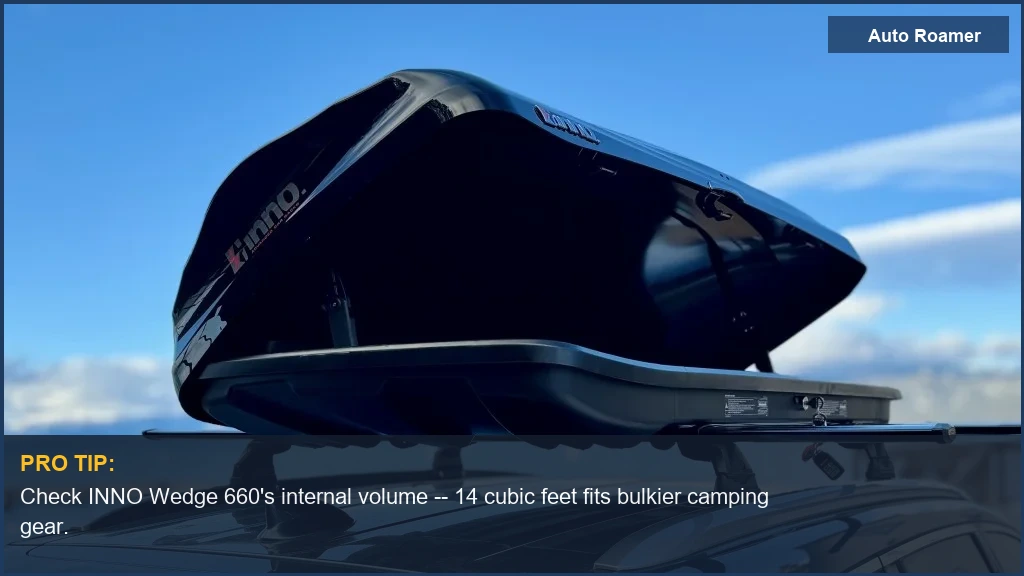
Mounting System is where cheap boxes fail. Look for quick-release clamps or U-bolts with robust, high-durometer plastic knobs. Flimsy clamps introduce play, which leads to vibration-induced fatigue cracks on your crossbars and the box itself. OutdoorGearLab noted that INNO Wedge 660 mounts with intuitive clamps that lock into place.
Opening Mechanism - single-side or dual-side. Dual-side access is a godsend when you're trying to grab something from the far side without climbing on your tires. It's a simple mechanical advantage. Single-side means more crawling around in the rain. Your call.
Security is about preventing opportunistic theft. A decent lock on the lid, integrated into the latch, is standard. The key shouldn't come out unless the box is fully latched. This isn't Fort Knox, but it'll deter a casual grab-and-run. Your gear is safer from thermal cycling and sticky fingers.
Aerodynamics isn't just about fuel economy. A poorly shaped box creates turbulence, which translates to noise and vibration. This constant resonant frequency can loosen hardware over thousands of miles. A low-profile, tapered design reduces drag and keeps your sanity intact. Apparently, a sleek design is a feature, not a bonus. Some users even find old Sears Cargo Carriers work fine.
Material Construction - most are ABS plastic. Look for thicker gauge plastic for rigidity. Thin plastic flexes, allowing water ingress and eventually cracking from repeated stress. UV inhibitors are critical to prevent material degradation from sunlight, which leads to brittleness over time.
Our Top Picks
The Boxes That Won't Leave You Stranded
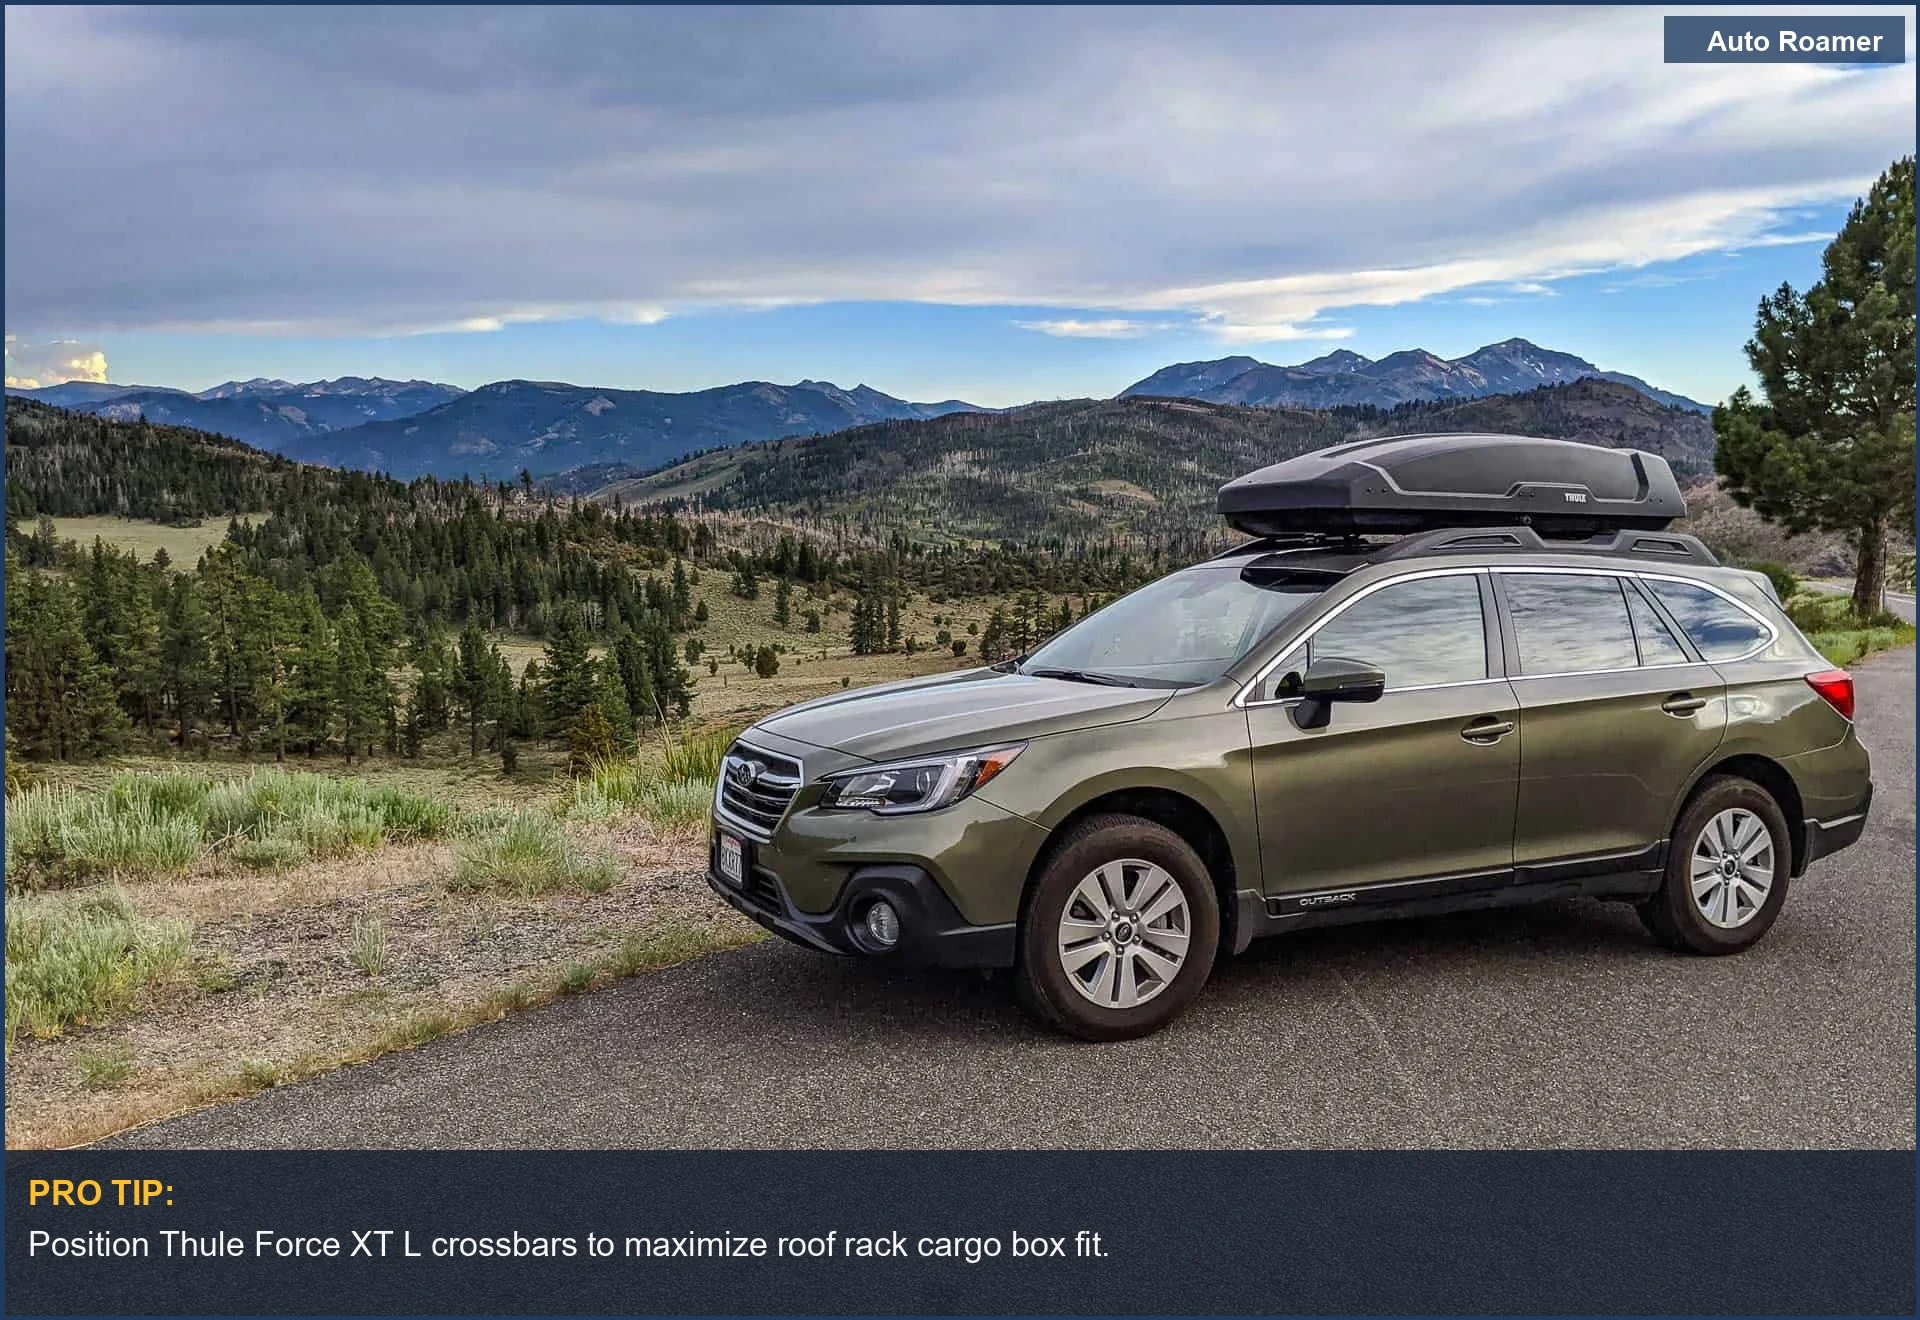
Here's what I'd bolt to my rig, based on actual use and failure rates I've seen. Thule Motion XT XL (~$1,000) Capacity: 21 cu ft Pros: Dual-side opening, PowerClick quick-mount system, integrated torque indicator prevents overtightening. This thing is over-engineered, which I appreciate. OutdoorGearLab found the Motion 3 XL ideal for larger loads. Cons: Price. It's a premium product, and you pay for the low tolerance manufacturing. Best-for: Anyone who values robust construction and ease of use over a budget price point. Hauling a lot of bulky, expensive gear. Yakima SkyBox NX XL (~$950) Capacity: 18 cu ft Pros: Sleek, aerodynamic profile reduces wind noise, dual-side opening, easy-to-use mounting hardware. The internal lid stiffeners prevent flex. Switchback Travel considers it a close second to Thule's top model. Cons: Can be a bit narrower than some competitors, which might be an issue for extra-wide skis. Best-for: Road warriors who want minimal aerodynamic drag and a clean aesthetic. Great for skis and snowboards. INNO Wedge 660 (~$750) Capacity: 11 cu ft Pros: Low-profile design, dual-side opening, quick installation. It sits close to the roof, reducing overall vehicle height. OutdoorGearLab loved how easy it was to set up. Cons: Smaller capacity might not be enough for larger families or extensive camping trips. The internal volume is tighter. Best-for: Smaller vehicles or those who need less bulky storage. Perfect for a couple's weekend trip or extra luggage. Thule Force XT L (~$700) Capacity: 16 cu ft Pros: Good balance of capacity and price, dual-side opening, sturdy AeroSkin textured lid. The internal stiffeners are solid. Car and Driver named it Best Overall. Cons: Not as premium-feeling as the Motion XT, some plastic components feel slightly less robust. Best-for: The generalist who needs reliable storage without breaking the bank. A solid all-rounder for varied use. SportRack Horizon Alpine (~$450) Capacity: 11 cu ft Pros: Budget-friendly, decent build quality for the price, single-side opening. It's a basic box that gets the job done without fuss. Cons: Single-side opening is a pain, mounting hardware can be clunky, and the plastic can feel thinner than premium options. Expect more vibration at speed. Best-for: Occasional users or those on a tight budget. It'll work, but don't expect it to last for decades of abuse.Budget vs Premium Options
The Cost of Quality: Where Your Money Goes
When you're looking at a $300 cargo box versus a $1,000 one, you're not just paying for a brand name. You're paying for material science and engineering tolerances. That $700 difference isn't arbitrary; it's the difference between a box that rattles like a tin can at 60 MPH and one that's barely noticeable. YouTube reviews often highlight the silent operation of premium models.
Budget boxes often use thinner ABS plastic, sometimes as thin as 2mm. This means less rigidity, more flex, and a higher probability of fatigue cracks forming around stress points like the mounting holes or lid hinges. Thermal cycling from sun exposure and cold nights will accelerate this material degradation.
Premium boxes, like a Thule Motion XT, use thicker, UV-stabilized ABS or even multi-layer plastics, often 4-5mm thick. This provides superior impact resistance and dimensional stability. The lock mechanisms are often integrated, using metal components with better corrosion resistance, rather than flimsy plastic tabs that snap off after a few years.
The mounting hardware is another key differentiator. Budget options might use basic U-bolts and plastic wing nuts that can loosen over time, leading to play and potential detachment. This is a mechanical bond failure waiting to happen. Facebook groups mention finding good deals on used Thule boxes, which often retain their hardware quality.
Premium boxes feature quick-release clamps with integrated torque indicators, ensuring a precise and secure fit every time. This reduces the risk of overtightening (damaging your crossbars) or undertightening (allowing the box to shift). It's a small detail, but it prevents a major failure mode. Less play means less vibration.
Setup and Installation Tips
Bolting It Down: Tips for a Secure Install
- Clean Your Crossbars First: Before you even think about putting the box on, wipe down your crossbars. Road grime and grit act as an abrasive, causing fretting corrosion between the box's mounting clamps and your crossbars. A clean surface ensures maximum friction and minimal wear. Switchback Travel emphasizes proper installation.
- Center It Up: Don't just slap it on. Measure the overhang on both the front and rear, and side-to-side. An off-center box creates uneven aerodynamic loading and unnecessary drag. This translates to increased wind noise and potentially higher fuel consumption. Aim for within 1 inch of perfect center.
- Torque It Right: If your box has a torque-limiting knob, use it. If not, tighten the clamps until they're snug, then give them another half-turn. You want firm contact, but don't crank it down like you're trying to crush a soda can. Overtightening can deform the plastic base of the box or even crack your crossbars. This is a material yield failure.
- Check for Play: After installation, grab the box and try to wiggle it. There should be minimal play - less than 0.1mm. Any significant movement indicates loose clamps. Re-tighten and re-check. Better to do it now than have it rattling down the highway.
- Test Drive and Re-check: Drive for about 10-15 miles, especially over some bumps. Then pull over and re-check all the mounting points. Vibration can cause initial loosening. This is critical for preventing a shear failure of the mounting hardware. You don't want your gear becoming road debris.
Care and Maintenance Tips
Keep It Running: Simple Box Longevity
- Clean It Regularly: Road grime, bug guts, and tree sap aren't just ugly; they can degrade the plastic finish. Use a mild soap and water solution, then rinse thoroughly. Avoid harsh chemical cleaners, as they can strip UV protectants and accelerate material aging. The Wirecutter suggests basic cleaning for all road trip gear.
- Lubricate the Locks and Hinges: Every six months, hit the lock cylinders with a squirt of graphite lubricant or a dry PTFE spray. The hinges can benefit from a light silicone spray. This prevents corrosion and ensures smooth operation, especially after exposure to road salt or dust. Don't use WD-40, it attracts dirt and gums things up.
- Inspect for Cracks: Periodically check the box's shell, especially around the mounting points and hinges, for hairline cracks. These are stress risers. Small cracks can be repaired with a good quality ABS plastic adhesive or epoxy before they propagate and lead to structural failure. Catch them early to prevent complete material separation.
- Store It Properly: When not in use, take the box off your roof. Store it in a garage or shed, out of direct sunlight and extreme temperatures. UV radiation causes outgassing and embrittlement of plastics. Storing it horizontally on a flat surface prevents warping or deformation over time. Don't leave it outside for three years. That's just asking for it to become brittle.
- Check Gaskets and Seals: The weather seals around the lid are crucial for keeping water out. Inspect them for tears, compression set, or hardening. If they're compromised, water ingress is inevitable. Replacement seals are usually available from the manufacturer and are a cheap fix compared to replacing water-damaged gear.
Final Recommendations
The Final Word on Hauling Your Stuff
Choosing a roof rack cargo box isn't rocket science, but ignoring the underlying physics will cost you. It's about balancing capacity, durability, and your budget without compromising circuit integrity (of your trip, anyway) or mechanical stress on your wallet. Travel and Leisure noted that even a medium carrier protected gear from light rain.
For most people, a mid-range box like the Thule Force XT L offers the best blend of features and value. It's built well enough to handle years of abuse without developing major failure modes, and it won't force you to take out a second mortgage.
If you're a frequent traveler or hauling expensive gear, don't skimp. The extra several hundred dollars for a Thule Motion XT or Yakima SkyBox NX buys you superior materials, better aerodynamics, and more robust mounting hardware. This means less vibration, less noise, and less chance of your gear ending up on the interstate.
Ultimately, the best cargo box is the one that fits your vehicle, your gear, and your driving habits without becoming a source of constant frustration. Do your measurements, check your budget, and don't buy the cheapest thing you find on Amazon unless you enjoy replacing it every other season. The cost-per-fix on those cheap units adds up fast.
Remember, a roof box is an extension of your vehicle's storage, not a disposable accessory. Treat it right, and it'll serve you for thousands of miles and countless adventures.

