The five-minute version: what actually holds a cargo net
Installing a cargo net in an SUV is rarely about the net itself. It is about finding the four or five places your vehicle was built to be tied down to, and clipping to those instead of to whatever plastic looks convenient. Get the anchor points right and almost any net works. Get them wrong and even an expensive net pulls loose the first time you brake hard for a deer.
Here is the whole job in one breath: figure out which type of net matches what you actually haul, open the owner's manual to see where the factory tie-down anchors live, clip the corners to metal first, then stretch the rest snug. No power tools required on the vast majority of SUVs. The sections below unpack each of those steps, but if you remember only one thing, make it this: anchor to metal, never to trim.
Why a sliding grocery bag is a bigger deal than it looks
A loose bag in the back seems harmless right up until physics gets a vote. In a sudden stop, anything that is not tied down keeps moving at whatever speed the car was doing until a seat-back, a window, or a passenger stops it. The force of that impact climbs with both the object's weight and how abruptly the vehicle slows.
Safety estimates illustrate the scale: a roughly one-pound object in a 35 mph crash can hit with up to about 100 pounds of force, and a 20-pound bag in a 55 mph crash with something near 1,000 pounds. Safety researchers have tied unsecured objects to roughly 13,000 injuries a year in the U.S.
That is the case for a net in one paragraph. It is also the reason the rest of this guide keeps drawing a line between what a net realistically does (keep light, soft, loose stuff from sliding and rattling) and what it does not do (act as a crash barrier for heavy or rigid gear). NHTSA's plain advice is to tie cargo down with rope, netting, or straps, keep heavy items low and centered, and secure large objects directly to the vehicle.

Four net shapes, four different jobs
"Cargo net" covers four fairly different products, and buying the wrong shape is the most common reason an install feels disappointing. Match the shape to the job before you match it to the vehicle.
- Ceiling / roof envelope nets stretch overhead between roof rails, grab handles, or coat hooks. They are for light, soft, low-density things only — jackets, hats, a sleeping bag, empty duffels. The anchors they use are interior trim handles that were never rated for weight, so resist the urge to load them up.
- Floor / cargo-area nets lie flat across the load floor and clip to floor anchors. They stop groceries and loose bags from sliding around on turns. They do not build a vertical wall; they keep the floor honest.
- Vertical barrier / divider nets stand upright behind the rear seats, floor to ceiling, to keep cargo or a dog from launching into the cabin. They usually combine floor straps with straps looped around the headrest posts.
- Trunk-organizer envelope nets are shallow stretch-mesh pockets that tension against a wall or seat-back to corral small loose items — tools, a first-aid kit, cables. Low capacity by design, but excellent at stopping rattle.
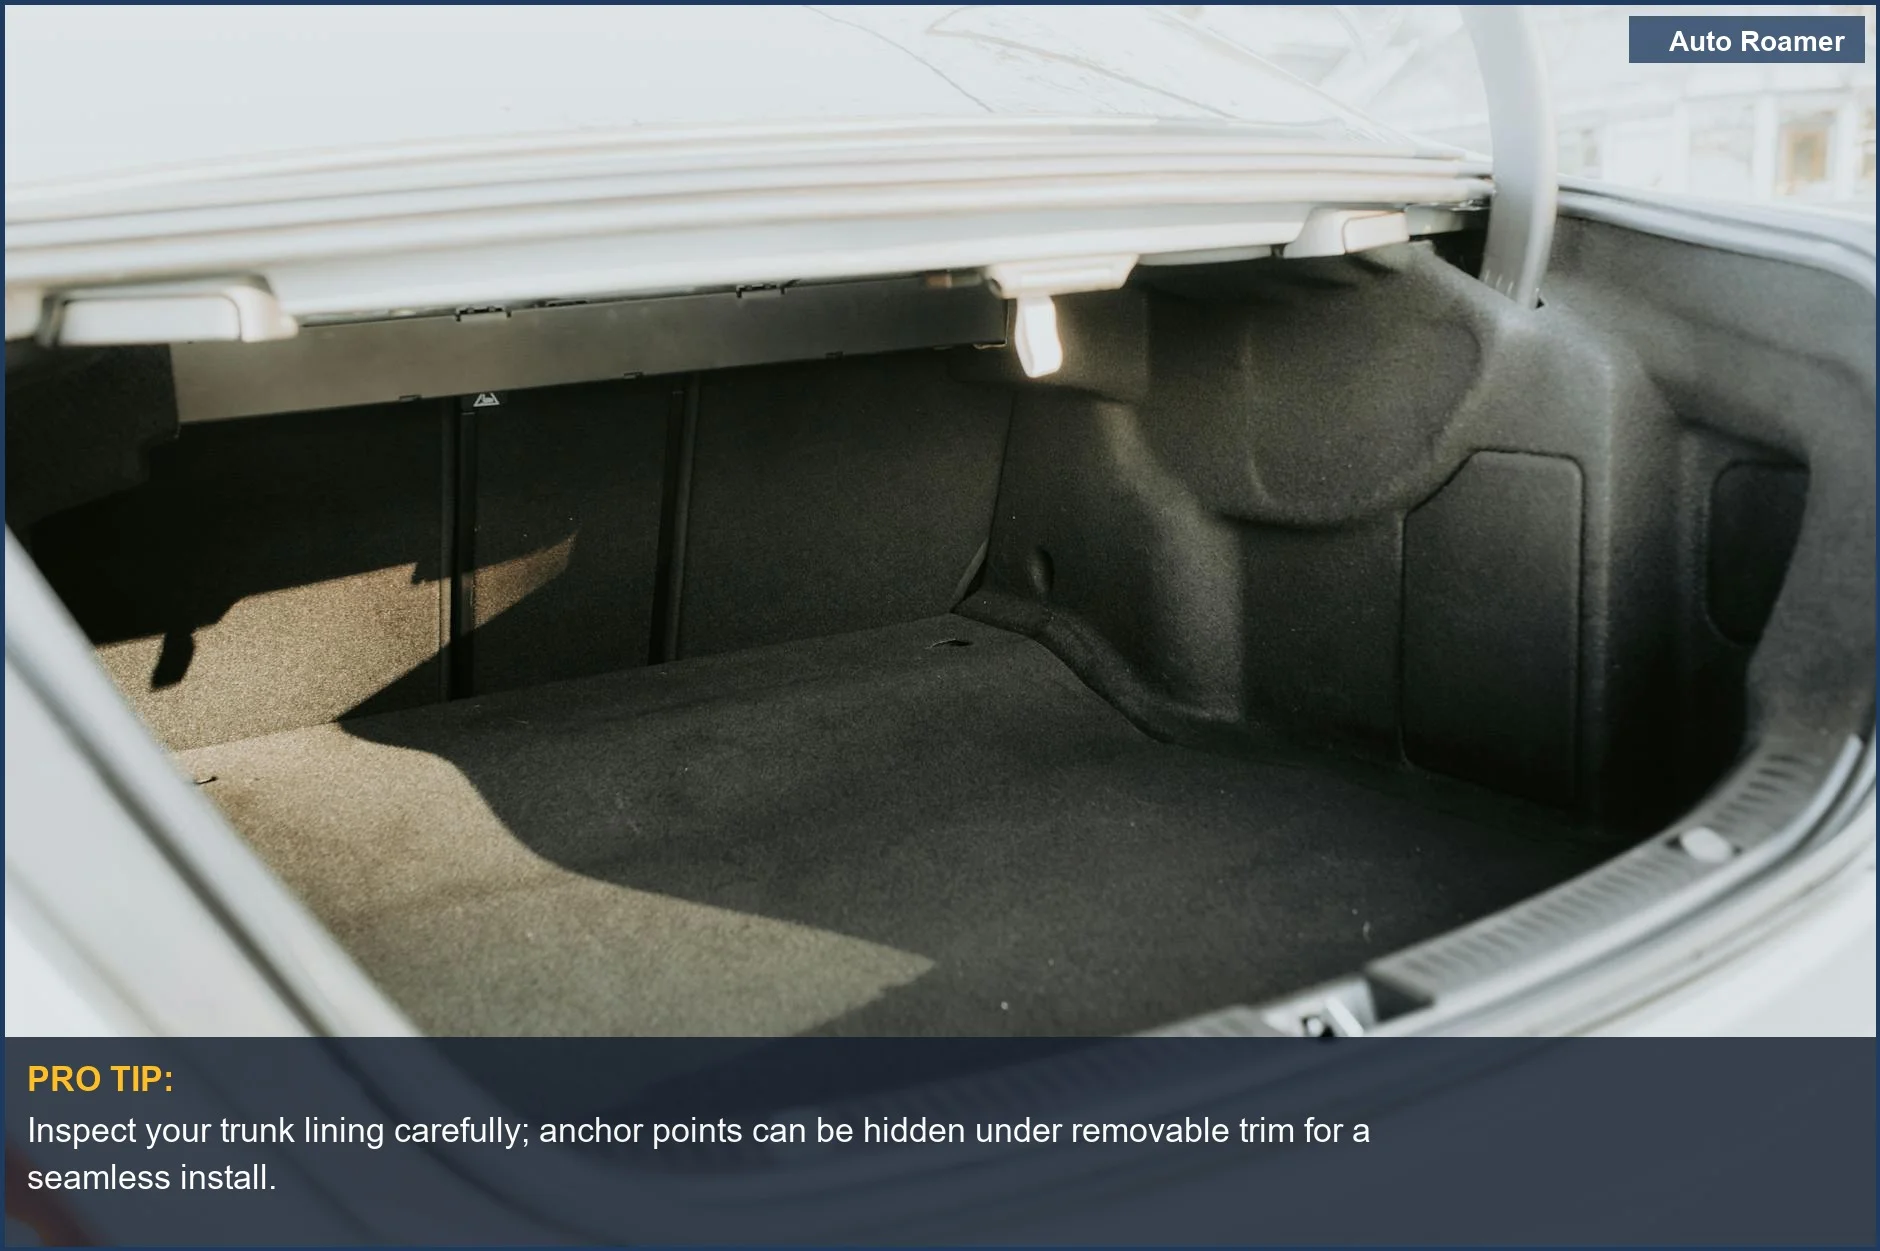
Where your SUV hides its real anchor points
Most SUVs give you more tie-down points than owners realize, but they are easy to miss because manufacturers tuck them away for a clean look. The usual suspects, roughly in order of strength:
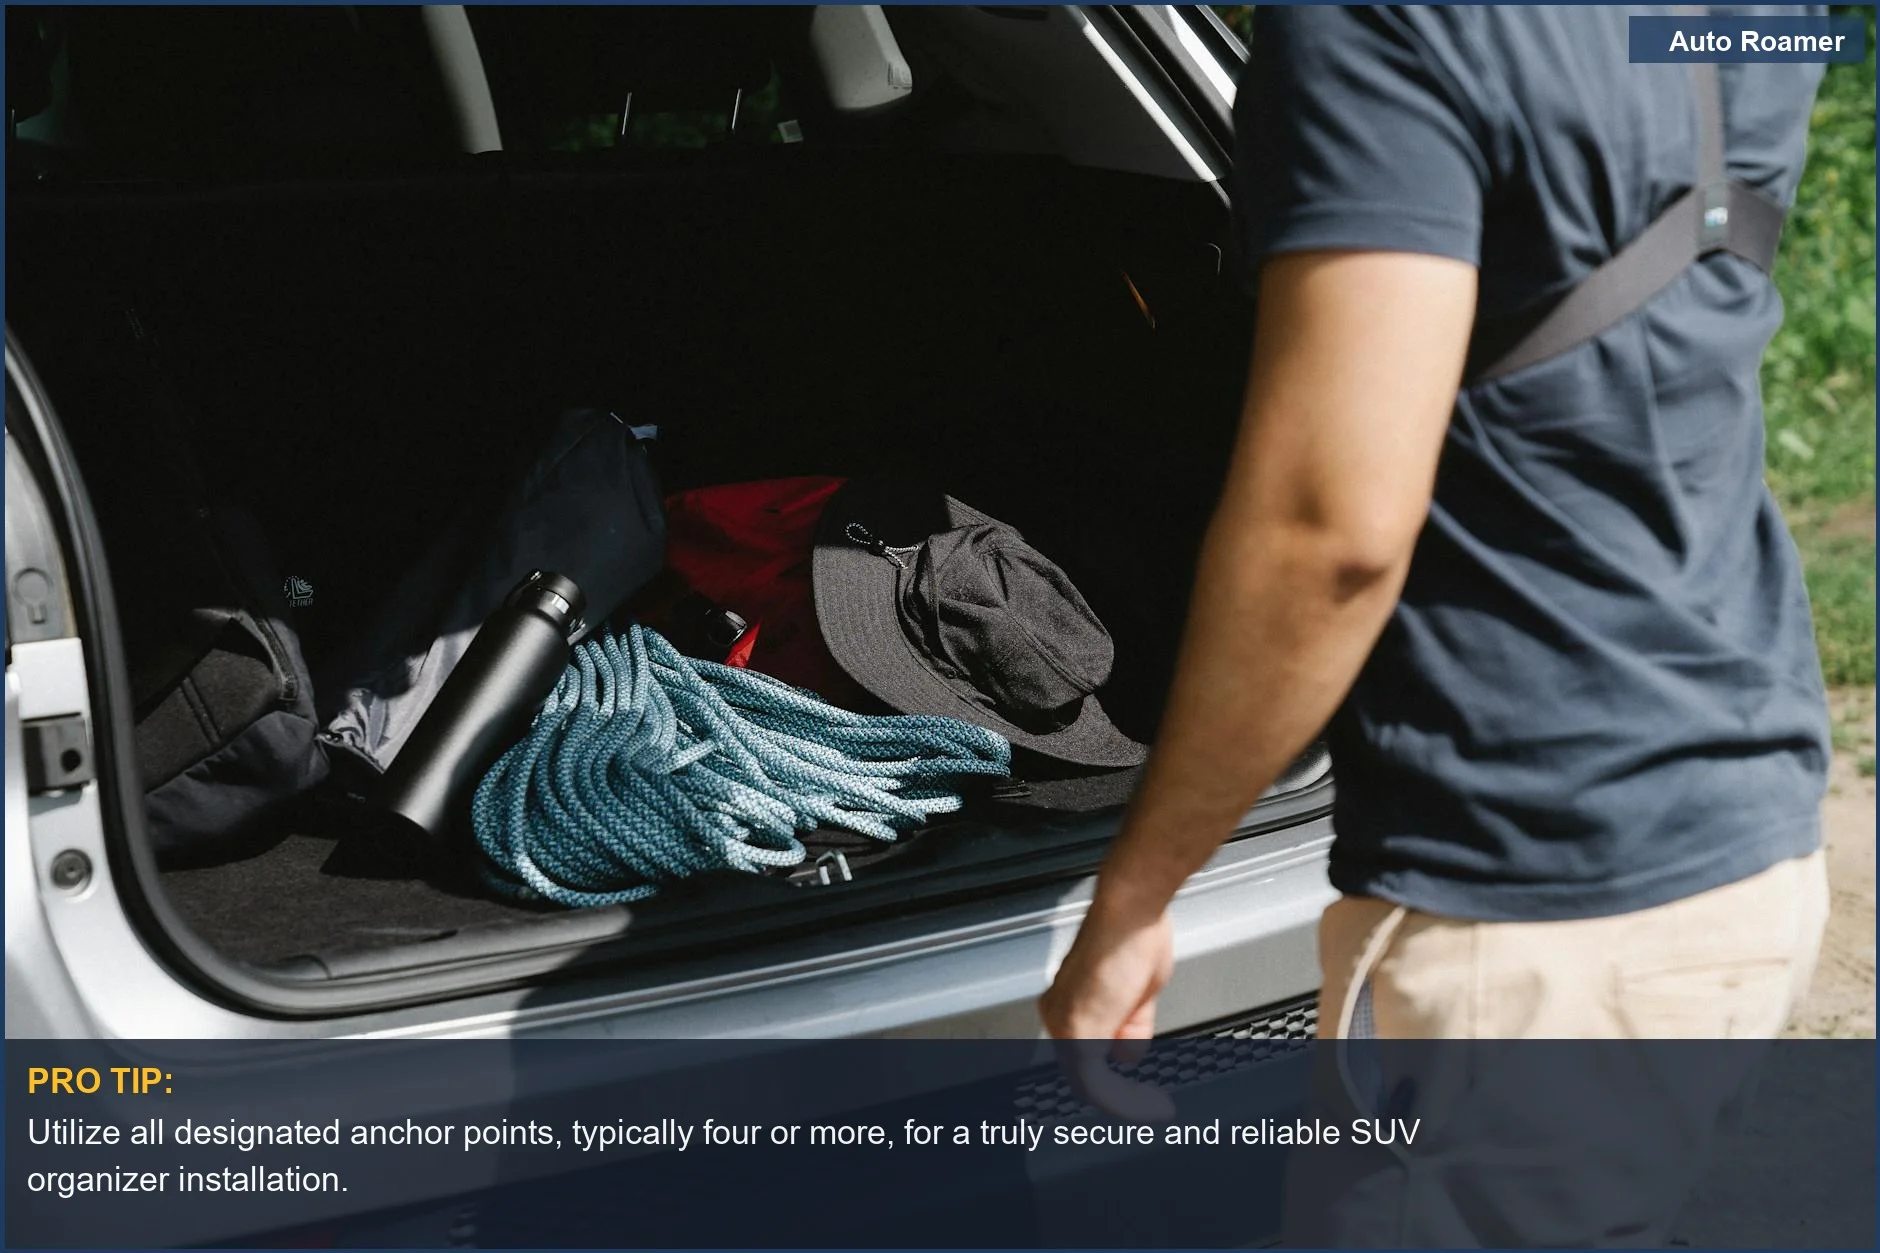
- Floor-mounted D-rings or metal loops at the four corners of the load floor, near the hatch opening. These are often the strongest anchors in the vehicle and are sometimes folded flush until you lift them.
- Recessed metal cargo hooks set into the side-wall trim, frequently just above the wheel wells.
- Threaded bosses hidden behind small pop-out plastic caps in the cargo sidewalls. Many SUVs put factory threads here for accessories; a commonly cited thread on some models is 7/16-20, though it varies.
- Factory tie-down rails or tracks along the floor or walls on vehicles that offer them, which accept sliding cleats.
One anchor that looks tempting and is not for this job: the LATCH lower child-seat anchors in the back seat. They sit in the passenger area, not the cargo bay, and NHTSA rates them for only about 65 pounds of combined load with child-seat geometry in mind. Leave them for car seats.
How to confirm an anchor before you trust it
Finding a hook is not the same as trusting it. The single best move costs nothing: open the owner's manual. Manufacturers diagram exact anchor locations and frequently print weight ratings, and those ratings vary a lot by make, model, and year — which is exactly why a generic number off the internet is worse than the page in your glovebox.
From there it is a short physical check. Run a hand along the corners of the load floor for flush-folded metal loops. Gently pry the small flip-up caps in the sidewalls to reveal threads or hooks underneath. When you press on a candidate anchor, ask one question: is this metal fixed to structure, or is it plastic trim that flexes? If it flexes, it is decoration, not an anchor, no matter how much it looks the part.
Installing the net, corner by corner
With the right net and confirmed anchors, the install itself is short. The order matters more than the speed — establishing a base before you tension is what keeps the net square.
- Measure the cargo area — width, depth, and the height where a barrier net would mount — and confirm the net is sized to match.
- Lay the net out flat with the hooks or clips facing outward so it cannot tangle as you work.
- Clip the four corners to the primary lower anchors first, but do not pull them tight yet. You are setting a frame.
- Connect the remaining perimeter points to the available hooks, cleats, or rails for even coverage. Add a closed or locking carabiner anywhere the net's hardware does not match the anchor.
- Now stretch and secure evenly until the net is snug across every point. A loose net lets cargo shift and rattle; an over-tightened one distorts the mesh and strains the trim. Snug is the target, not maximum tension.
- Tug each attachment to confirm the hooks are fully seated, then load-test with light items and a short drive before you trust it with a full hatch.
Keeping the drill in the toolbox: no-hole mounting
- Use what is already there. Clip directly to the factory D-rings, hooks, and rails. On the large majority of SUVs this is all you need.
- Adapt with connectors. Closed or locking S-biners and carabiners bridge a net's hardware to a different anchor type or add a few inches of reach.
- Wedge instead of fasten. Tension-mount nets brace between two surfaces — floor to ceiling or wall to wall — with friction feet or a spreader bar, no fasteners at all.
- Loop the headrests. Barrier nets commonly take their upper mount from straps around the rear-seat headrest posts, paired with floor straps below.
- Bolt into existing threads. If you want a permanent rated anchor, a bolt-in anchor plate or hook kit threads into the factory bosses already in the sidewall — still no new holes.
The mistakes that quietly defeat a good net
Even a well-chosen net can be undone by a few habits. These are the ones worth naming, because each one feels reasonable in the moment.
The most dangerous shortcut is the bungee cord. Its rubber degrades under sun and repeated stretching, and the hook end can detach under tension and recoil — sources cite speeds up to about 60 mph. Eye injuries are the most common and sometimes severe bungee accident, which is why fixed-length webbing with cam buckles is the safer way to hold heavier items.
The rest of the list is about respecting the net's limits. Do not anchor to flimsy trim or non-load-bearing caps; under load they pull out or shatter. Do not over-rely on a net for heavy or rigid gear — nets restrain soft, light, loose cargo and are not crash-rated, so heavy items belong on direct tie-downs to rated anchors, riding low and braced. And do not treat a mesh barrier as a crash-rated pet restraint; it reduces distraction and casual roaming, but the safest transport for a dog is a crash-tested crate or a dedicated pet seat-belt.
A loaded hatch on a back-road weekend
Picture a Friday-evening load-out: cooler, a soft duffel of clothes, a tent bag, a grocery sack of food riding on top, and a dog who would very much like to supervise from the front seat. That mix is exactly where matching net to job pays off.
The floor net clipped to the rear D-rings keeps the cooler and grocery sack from sliding into a heap on the first switchback. A barrier net strapped to the headrest posts and floor keeps the dog — and a stray tent pole — out of the cabin without a single drilled hole. The soft duffel can ride up top under a ceiling envelope net if space is tight. The cooler, the one heavy, rigid item, is the exception: it gets a cam-buckle strap straight to a rated anchor, because that is the job a net was never meant to do. Five minutes of setup, and nothing in the back is a surprise when you stand on the brakes for that deer.