
Wire It in the Right Order
Before you chase a fault code, make sure the controller was connected in the right sequence - because getting it wrong is a leading cause of a dead or faulted unit. The rule is fixed: connect the battery to the controller first, then the solar panels. When disconnecting, remove the panels first, then the battery. That order is not a preference; it is how the controller is designed to be powered up and shut down safely.
The reason is in the electronics. A charge controller uses the battery as its voltage reference - the baseline it regulates the incoming solar power against. Connecting panels before the battery can damage the controller because it has no battery reference to regulate the incoming PV power, so it sees raw panel voltage with nowhere to send it. On a sunny day that is a real way to fry a controller the first time you wire it.
This trips people up during installs and rewiring. Someone lays out the array, plugs the panels in to see the light come on, and only then connects the battery - exactly backwards. If a controller went dead or faulted right after an install or a reconnection, wrong connection order is the first thing to suspect. Rewire it correctly - battery first, panels second - and confirm the controller powers up before you assume the unit itself is the problem. Half of controller failures never happen at all if the sequence is respected.
'No Battery Detected' Is the Most Common Fault
The single most frequent reason an MPPT controller sits there doing nothing is that it cannot find the battery. MPPT controllers need the battery detected at a minimum voltage to begin charging, and a deeply discharged or disconnected battery reads as no battery - so the controller won't start. It is not being stubborn; it genuinely cannot see a valid battery to charge.
This creates a nasty chicken-and-egg problem. A battery that has been drained flat may sit below the controller's detection threshold, so the controller refuses to charge it, so it never comes back up. The solar array can be in full sun producing plenty of power, and nothing happens, because the controller is waiting for a battery voltage that the dead battery cannot provide on its own. From the outside it looks like a broken controller; underneath it is a battery too low to be recognized.
Diagnose it with a meter. Verify the battery connection by confirming similar voltage readings at the battery terminals and at the controller's battery terminals. If the battery reads a healthy voltage but the controller's terminals read much lower or nothing, you have a broken connection or blown fuse between them. If the battery itself is simply too flat to detect, it usually needs a top-up from another source - a shore charger or a DC-DC feed - to bring it above the threshold, after which the controller wakes up and takes over. A controller that starts charging the instant the battery is revived was never faulty.
PV Over-Voltage: Too Many Panels in Series
The second-most-common fault is the opposite problem: too much voltage coming in from the panels. PV over-voltage - shown as a Renogy E10 or Victron PV-voltage error - occurs when the panel string's open-circuit voltage (Voc) exceeds the controller's maximum PV input rating. Wire too many panels in series and the array's Voc climbs past what the controller can accept, and it faults to protect itself.
What makes this sneaky is temperature. Panel Voc rises in cold weather: near or below 10C (50F) an array can exceed its rated Voc even though it was fine in summer. A string that measured safely within limits on a warm install day can push over the edge on the first cold morning, throwing an over-voltage fault that seems to come from nowhere. This is why an array that worked all summer suddenly errors in winter.
The fix is margin. Keep at least a 10% Voc safety margin below the controller's limit, and calculate the array's Voc at the coldest temperature you expect, not at room temperature. If the string is already over, the remedy is to reconfigure it - fewer panels in series, or a series-parallel arrangement that lowers voltage while keeping current - or to move to a controller with a higher PV input rating. An over-voltage fault is the controller doing its job; the answer is to bring the array's cold-weather Voc back under the ceiling with headroom to spare.
Reading the Fault Codes
Most controllers tell you exactly what is wrong if you read the code instead of just resetting it. Two battery-side codes cover a lot of ground. A battery over-discharge fault - Renogy E01 - means battery voltage is too low; reduce the loads and recharge, then confirm the reading with a multimeter. A battery over-voltage fault - Renogy E02 - means battery voltage is too high; disconnect the battery and inspect the charging source, because something is pushing it above its safe ceiling.
The discipline that matters is confirmation. Voltage-based fault codes should always be confirmed against a multimeter reading, since a false sensor reading can trigger a shutdown that isn't real. A controller relies on its own internal sensing, and a bad connection or a flaky sensor can make it believe the battery is too low or too high when a meter on the terminals says otherwise. Before you act on a code, put a digital multimeter on the actual battery terminals and see whether the number agrees.
That one habit saves a lot of wasted effort. If the code says over-discharge and the meter confirms a genuinely low battery, you have a real charging or load problem to solve. If the code says over-discharge but the meter shows a healthy battery, the fault is in the sensing path - a loose battery-terminal connection at the controller, corroded contacts, or a bad wire - not in the battery at all. The code points you to the neighborhood; the meter tells you which house.
Reverse Polarity on PV or Battery
Swapping positive and negative on either side of a charge controller is a fast way to kill it or throw it into a fault. Reverse polarity on either the PV or battery terminals is a common cause of a dead or faulted controller; many units are protected but some are damaged. Unlike over-voltage, which the controller is built to survive, a reversed connection can go straight past the protection on cheaper units and take out the electronics.
The risk lives in the wiring, not the controller. Solar leads and battery cables both carry a positive and a negative, and a rushed connection - especially with aftermarket cables whose colors do not follow convention - is easy to get backwards. On the PV side, a mis-wired MC4 connector or a panel wired against its markings reverses the input; on the battery side, red-to-negative does the same. Either way the controller sees current flowing the wrong direction.
Prevent it rather than repair it. Before connecting either side, verify polarity with a meter instead of trusting insulation color, and connect in the correct order - battery first, panels second - so any mistake shows up before the array is feeding power. If a controller died immediately after someone touched the wiring, reverse polarity belongs at the top of the suspect list alongside wrong connection order. A protected unit may shrug it off; an unprotected one will not, which is exactly why the ten-second meter check is worth the habit.
MPPT vs PWM: Efficiency and Behavior
Some 'not charging enough' complaints are not faults at all - they are the limits of the controller type. MPPT controllers are typically about 93-99% efficient, commonly 95-98%, while PWM controllers are roughly 70-80% efficient. That gap is real energy: an MPPT unit harvests more from mismatched panel and battery voltages because it converts the panel's higher voltage down into extra charging current, where a PWM controller simply throws that headroom away.
This matters most when the panel voltage sits well above the battery voltage - a common case with modern higher-voltage panels on a 12V battery. An MPPT controller turns that voltage difference into current and charges faster; a PWM controller pulls the panel down to battery voltage and loses the difference as wasted potential. If a system is charging slower than expected on a PWM controller, that is often the technology working as designed, not a malfunction.
The trade-off is cost against harvest. PWM is cheaper and fine for small, voltage-matched arrays; MPPT costs more but earns it back in current on any larger or higher-voltage array. If your complaint is slow charging rather than a fault code, first confirm the controller type and the panel-to-battery voltage relationship before assuming something is broken. A PWM controller delivering PWM-level results is not defective - it is just leaving harvest on the table that an MPPT unit would have captured.
Set the Battery Voltage Manually
A controller charging wrong - or not at all - sometimes just has the wrong system voltage set. The battery voltage setting (12/24/48V) may be auto-detected incorrectly, so set it to a fixed value manually if the controller misreads it. Auto-detection samples the battery at power-up, and a low or oddly connected battery can fool it into picking the wrong system voltage, after which every charging target it uses is wrong.
The symptom is charging behavior that makes no sense: a 12V battery that never reaches full because the controller thinks it is on a 24V system, or a controller that faults because its targets do not match reality. Auto-detect is a convenience that fails quietly, and because it only runs at startup, it can lock in a wrong guess made during an install when the battery happened to be low.
The fix is to stop guessing and tell it. Enter the controller's settings and set the battery voltage to the fixed value that matches your actual system - 12, 24, or 48V - rather than leaving it on auto. While you are in there, confirm the battery chemistry/type profile is correct too, since the charging voltages differ between lithium, AGM, gel, and flooded. A controller with the right system voltage and the right battery profile charges predictably; one left on auto-detect can surprise you every time it reboots.
Clearing Internal Protection Faults
Some faults are internal protection states that need a specific reset sequence, not just a power blip. On Victron units, internal PV-short protection faults - errors 38, 39, and 80-87 - clear with a deliberate procedure: disconnect the panels, disconnect the battery, wait about 3 minutes, then reconnect the battery first and the panels second. That wait matters; the controller needs time to fully de-energize its internal capacitors before it will re-initialize cleanly.
Notice that the reset sequence is the same safe order as a first install - battery before panels - because the reason is the same: the controller wants a battery reference in place before it sees PV power. Rushing the reconnection, or doing it panels-first, can drop the unit straight back into the fault it was trying to clear. Follow the sequence exactly and give it the full pause.
A related class is measurement faults. If a current-measurement or out-of-range fault appears, disconnect all the wires and reconnect them to restart the controller - a full de-power often clears a transient sensing glitch. If the same fault returns immediately after a clean reset, though, stop resetting: a fault that will not clear is pointing at a real wiring or hardware problem, and the next section covers the grounding and sensor mistakes that most often cause it. Reset once, properly; if it comes back, diagnose rather than repeat.
Grounding, Sensors, and Fuses
A handful of wiring mistakes cause faults that no amount of resetting will fix, and grounding is the big one. Ensure the controller's negative path - PV-minus and battery-minus - is not bypassing the controller through a shared ground, because that corrupts the current sensing. Charge controllers measure current by watching what flows through their own negative terminals; give that current an alternate path through a common chassis ground and the controller's math goes wrong, throwing measurement faults that look like hardware failures.
Sensors are the next trap. A remote temperature sensor mistakenly connected to the battery-positive or battery-negative terminal is a frequent error trigger - connect it only to the dedicated sense port. The temperature sensor carries a tiny signal, and landing it on a power terminal feeds the controller garbage, so it faults. It is an easy mistake on a crowded terminal block and an easy fix once you know to look.
Finally, fuse the system correctly on both sides. Fuse both the PV-to-controller and the controller-to-battery lines; the battery fuse is typically sized to the controller's rated charge current - a 40A controller uses about a 40-50A battery fuse. A blown or corroded fuse on either line produces a no-charge condition that mimics a dead controller, and an unfused system is both unsafe and hard to diagnose. Match the fuse to the controller's rating, keep the negative path clean through the controller, and land the temperature sensor where it belongs - three wiring details that resolve a surprising share of stubborn faults.
The Verdict: Confirm the Number, Then Fix It
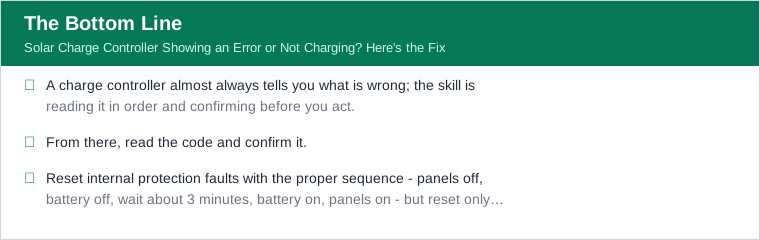
A charge controller almost always tells you what is wrong; the skill is reading it in order and confirming before you act. Start with the basics that cause the most failures: was it wired battery-first, is the battery healthy enough to be detected, and is the array's cold-weather Voc under the controller's input limit with a 10% margin. Those three - connection order, battery detection, and PV over-voltage - cover the large majority of controller complaints.
From there, read the code and confirm it. Every voltage-based fault should be checked against a multimeter on the actual terminals, because a false sensor reading can trip a shutdown that is not real. If the meter agrees with the code, fix the cause - recharge an over-discharged battery, inspect an over-voltage charging source, reconfigure an over-voltage array. If the meter disagrees, chase the sensing path: a shared ground, a mis-landed temperature sensor, a blown fuse, or a corroded connection.
Reset internal protection faults with the proper sequence - panels off, battery off, wait about 3 minutes, battery on, panels on - but reset only once. A fault that returns immediately is a wiring or hardware problem, not a glitch, and repeating the reset just wastes daylight. Work the causes in order, confirm every number, and a controller that seemed dead usually turns out to be a battery, a fuse, or a connection away from charging again.