
What the E1 Code Is Actually Telling You
A diesel heater that lights its glow plug, hums for a minute, then throws an E1 and shuts down is not broken in some mysterious way. It failed to establish a flame, and the controller stopped the cycle before dumping raw fuel into a cold chamber. The code is the heater protecting itself, not a random glitch.
The frustrating part is that the code is not standardized. Error-code meanings vary by controller. On the common LCD controller, E-01 means undervoltage, that the battery supply is too low to run a clean start. On some other controllers the same E-1 is shown as a generic start-up failure, and ignition failure is reported instead as E-10. So the first job is to read the code against the little card or manual that came with your specific unit, because the same digits can point at different links in the chain.
Whatever the label, a no-start on a Chinese diesel air heater almost always traces to one of three things, in this order of likelihood: not enough voltage, a glow plug that can no longer ignite the fuel, or fuel that is not reaching the chamber. This guide walks each link in the order that solves the most no-starts fastest, so you are not tearing into the fuel system when the real problem is a tired battery.
Work it as a sequence, not a guess. Voltage is quick to check and the most common culprit, so it goes first. Ignition is next. Fuel is last because it is the most involved. Following that order is what turns an intimidating fault code into a ten-minute diagnosis.
Match the Symptom to the Cause
Before touching anything, line up what the heater is doing against the likely cause. The pattern of the failure narrows the search before a single tool comes out.
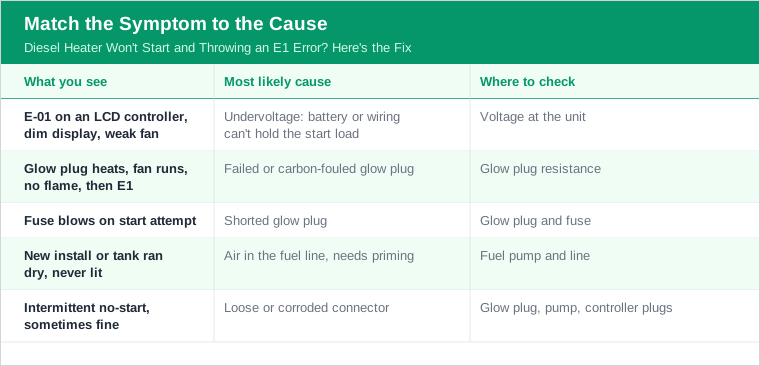
| What you see | Most likely cause | Where to check |
|---|---|---|
| E-01 on an LCD controller, dim display, weak fan | Undervoltage: battery or wiring can't hold the start load | Voltage at the unit |
| Glow plug heats, fan runs, no flame, then E1 | Failed or carbon-fouled glow plug | Glow plug resistance |
| Fuse blows on start attempt | Shorted glow plug | Glow plug and fuse |
| New install or tank ran dry, never lit | Air in the fuel line, needs priming | Fuel pump and line |
| Intermittent no-start, sometimes fine | Loose or corroded connector | Glow plug, pump, controller plugs |
Notice that three of the five rows point at voltage or ignition, not fuel. That is why the sequence below leads with the battery. A heater that has run fine for weeks and suddenly refuses on a cold morning is far more often a sagging battery than a failed part.
The exception is a heater that has never lit, straight out of the box or after the tank ran dry. That case jumps toward fuel and priming, because the line is full of air the pump has to work out before ignition can succeed. Identify which story matches yours and start at the matching link.
First Link: Confirm the Voltage at the Unit
Voltage is first because it is the most common no-start cause and the fastest to check. During startup the glow plug draws roughly 6 to 10 amps, and that surge is what exposes a weak supply. A battery that reads fine at rest can sag below the threshold the moment the glow plug loads it.
The number to hit is straightforward: the heater needs at least 12.5V measured at the unit during starting. Below about 12.5V it becomes hard to start, and on the common controller that is exactly what trips the E-01 undervoltage code. A fully charged battery should read over 12.8V before you even begin. On a 12V system, supply below about 10V will trigger a hard low-voltage cutoff; on a 24V system that cutoff is below about 20V.
Measure at the heater's own terminals while it tries to start, not just at the battery. The gap between the two numbers is the whole story: a voltage drop of more than 0.4V between the battery and the heater means the supply cabling is too thin or has a bad connection.
If the battery is strong but the voltage at the unit is low, the wiring is the problem. The recommended cure is running a dedicated 6mm squared automotive cable directly to a known-good battery, which carries the startup surge without the drop that starves the glow plug. Thin included wiring tapped into an accessory circuit is a classic cause of a heater that starts on a full battery and refuses on a half-flat one.
Second Link: Test the Glow Plug
If voltage checks out and the heater still throws the code, the glow plug is the next suspect. This is the part that heats up to ignite the atomized diesel, and it is a wear item. A no-start caused by ignition failure is most often a carbon-clogged or failed glow plug that can no longer get hot enough to light the fuel.
The test is simple with a multimeter: a healthy glow plug measures less than 1 ohm of resistance. A high or infinite reading means the plug has failed and must be replaced. There is a louder symptom too, if the heater's fuse keeps blowing on startup, the glow plug has likely shorted out, and a short is what draws the current that pops the fuse.
Glow plugs are consumable, and that matters for how you plan. Inexpensive glow plugs typically last only about 6 to 8 months of regular use, so a heater that lit reliably last winter and refuses this one may simply be due for a fresh plug. Carrying a spare is cheap insurance against a cold night with no heat.
Replacing the plug is a straightforward job on most units, and a quality replacement pays for itself the first time it saves a trip. A spare diesel heater glow plug stored with the unit means an ignition failure in the field is a ten-minute swap instead of a ruined night, provided you have confirmed the plug is the actual fault and not a symptom of low voltage cooking a good plug.
Third Link: Fuel and Priming
If voltage and the glow plug are both good, the chamber is not getting fuel to ignite. On a new install or a tank that has run dry, this is expected, not a fault: the line is full of air, and the pump has to work it out before ignition can succeed. It commonly takes 2 to 3 priming cycles to purge the air from the fuel line before the heater will light.
Air is the enemy here because the pump meters fuel in tiny doses and air is compressible, so a line with a bubble in it delivers nothing useful. Use the controller's prime or pump function to run the fuel through until the line fills, and give it the 2 to 3 cycles it usually needs. Rushing this and expecting a first-try light after a dry tank is a common self-inflicted no-start.
The fuel system geometry matters for keeping air out. The fuel pump should be mounted at least 45 degrees angled upward so air rises out toward the heater rather than pooling and being pumped. Keep the runs short: a maximum of 2 metres from tank to pump and a maximum of 5 metres from pump to heater, with the tank sitting no more than 2 metres below the pump. A pump fighting a long lift or a downhill run is a pump that starves the flame.
Finally, do not overlook the plumbing you cannot see. Blocked air intake or exhaust piping disrupts combustion and can cause a failed-ignition no-start, so check both pipes for obstructions, a wasp nest, road debris, or a crushed section, before assuming the fuel system is at fault.
The Connections Nobody Checks First
Between voltage and fuel sits a cause that is easy to skip and quick to fix: bad connections. Loose or corroded connections at the glow plug, fuel pump, and controller plug are a frequent cause of intermittent no-start faults, and they are the reason a heater lights fine one day and throws a code the next.
The tell for a connection problem is inconsistency. A heater that fails randomly, works after you wiggle a plug, or starts only when the vehicle is level is describing a bad contact, not a dead part. Vibration from driving loosens spade connectors and road salt corrodes them, and either one adds resistance exactly where the high startup current cannot tolerate it.
The fix is unglamorous and effective: unplug, inspect, and reseat every connector in the chain, cleaning any green or white corrosion off the pins. Pay closest attention to the glow-plug and pump connections, because those carry the current that matters at start. A dab of dielectric grease on a clean connector keeps moisture out afterward.
This step earns its place near the top of the list because it costs nothing and catches a fault that a resistance test on the glow plug alone would miss. A perfectly good glow plug reading under 1 ohm still will not fire if the connector feeding it is corroded to the point of dropping the voltage across it.
Why Cold Weather Makes It Worse
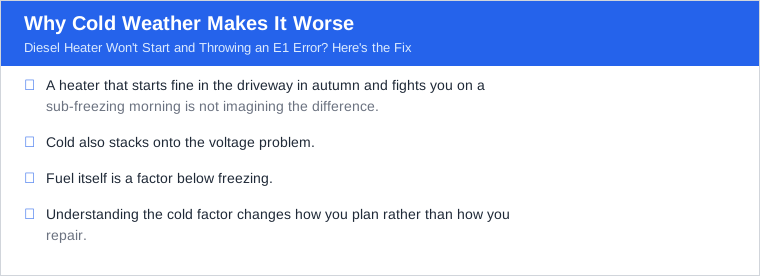
A heater that starts fine in the driveway in autumn and fights you on a sub-freezing morning is not imagining the difference. Cold-start no-starts are genuinely worse in cold weather, because low temperatures reduce fuel atomization and delay ignition. The same glow plug and the same voltage have a harder job when everything is cold-soaked.
Cold also stacks onto the voltage problem. Battery capacity falls as temperature drops, so the very morning the glow plug needs its full 6 to 10 amps is the morning the battery is least able to supply it without sagging. Two weaknesses that are each survivable in mild weather combine into a no-start when it is genuinely cold.
Fuel itself is a factor below freezing. In temperatures below 0 degrees C, diesel can begin to gel and thicken, which starves the pump and delays ignition. Adding about 2 litres of kerosene per 10 litres of diesel prevents the fuel gelling and keeps it flowing to the pump. This is a standard cold-climate practice, not a hack, and it removes fuel as a variable when you are chasing a cold-morning no-start.
Understanding the cold factor changes how you plan rather than how you repair. Keep the battery charged, run the anti-gel fuel mix when it is cold, and expect the start cycle, which takes about 6 minutes end to end, to feel more marginal when the mercury drops. A heater that is healthy in October can need all three of those margins restored to fire reliably in January.
The Fix Sequence, Start to Finish
Put together, the diagnosis runs as a short, ordered checklist that resolves the large majority of E1 no-starts without guesswork. Follow it top to bottom and stop when the heater lights.
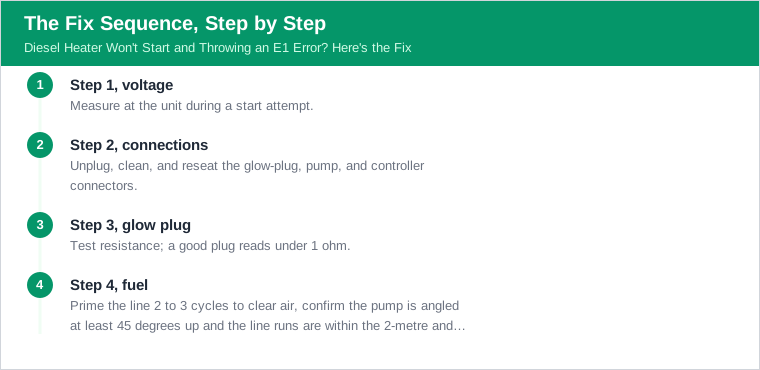
Step 1, voltage. Measure at the unit during a start attempt. Confirm at least 12.5V at the heater with the battery over 12.8V at rest, and check the drop from battery to unit is under 0.4V. If voltage is low, charge the battery or upgrade to 6mm squared cable direct to the battery before anything else.
Step 2, connections. Unplug, clean, and reseat the glow-plug, pump, and controller connectors. This is free and catches the intermittent faults that no single-part test will.
Step 3, glow plug. Test resistance; a good plug reads under 1 ohm. Replace a plug that reads high, that came with a blown fuse, or that is simply past its 6-to-8-month service life.
Step 4, fuel. Prime the line 2 to 3 cycles to clear air, confirm the pump is angled at least 45 degrees up and the line runs are within the 2-metre and 5-metre limits, and check the intake and exhaust pipes are clear. In the cold, run the kerosene-and-diesel mix. Work this link last because it is the most involved and the least common cause of a sudden no-start.
When to Fix a Part vs. Replace the Heater
Most E1 no-starts are a cheap part or a free adjustment, not a dead heater. A glow plug, a length of proper cable, a cleaned connector, and a proper prime cover the overwhelming majority of cases, and none of them cost much or take long. The instinct to replace the whole unit after one fault code is almost always premature.
The parts worth stocking are the ones that wear. A spare glow plug is the single highest-value item, given its 6-to-8-month life, followed by a spare fuel pump and a length of rigid fuel line. A heater that a camper can service in the field with a handful of consumables is a heater that stays useful for years, which is much of the appeal of these units in the first place.
Replacement of the whole heater makes sense in a narrower set of cases: a cracked combustion chamber, a burned-out control board that no longer drives the glow plug or pump, or a unit so carbon-choked that repeated cleaning no longer restores it. Even then, the fault usually announces itself as something more than a start code, physical damage, smoke, or a dead display.
The honest read is that a single E1 is a diagnostic starting point, not a verdict. Work the voltage-ignition-fuel sequence, replace the one worn part it points to, and the heater comes back. Reach for a new unit only when the sequence has cleared every link and the heater still will not hold a flame, which is rare on a heater that was lighting normally not long ago.
The Verdict: A Code, Not a Death Sentence
An E1 that stops a diesel heater cold is one of the more alarming things a fault code can do on a winter night, but it is also one of the most solvable. The code means the heater tried to start and could not establish a flame, and the reason is almost always a single weak link in the voltage-ignition-fuel chain.
Read the code against your own controller's card first, because E-01 means undervoltage on the common LCD board while other controllers use E-1 for a generic start failure and E-10 for ignition. Then work the links in order: confirm at least 12.5V at the unit, clean the connectors, test the glow plug for under 1 ohm, and prime the fuel line 2 to 3 cycles. That sequence resolves the large majority of no-starts.
Cold weather stacks the odds against a marginal setup, so keep the battery charged, run the anti-gel fuel mix below 0 degrees C, and give the roughly 6-minute start cycle the healthy voltage it needs. A heater that lit reliably in autumn usually just needs one of those margins restored to fire in the deep cold.
Keep a glow plug and a length of proper cable with the unit, and an E1 in the field becomes a short repair rather than a ruined trip. The code is information, a map to the one link that broke, and following that map is what keeps a cheap, serviceable heater doing its job season after season.